Hello tech enthusiasts! Welcome back to jasta, your go-to destination for all things tech. Today, we’re diving into how to create your first Android app with Java, providing a step-by-step guide to help you accomplish this on your computer. Whether you’re a seasoned tech guru or just starting your digital journey, our straightforward instructions will make the process a breeze. Let’s jump in and create an Android app with Java.
Table of Contents
Creating an Android App with Java in Android Studio
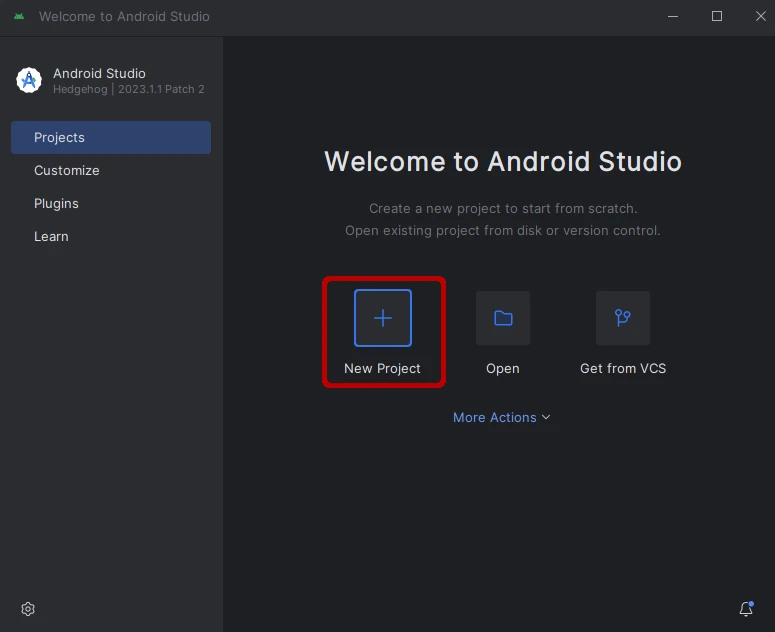
To start, you first need to click on the new project button to start configuring your Android app.
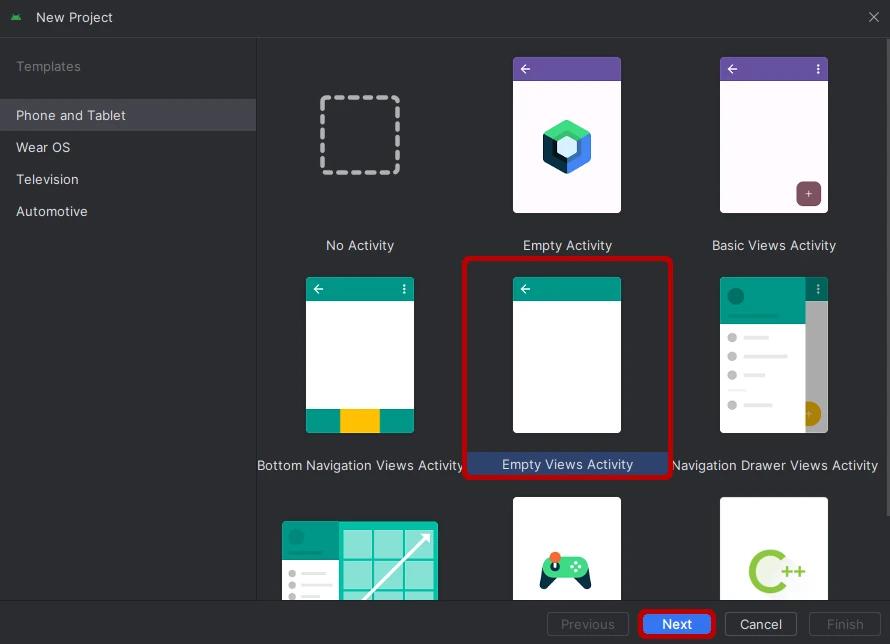
On the first page, you need to select what activity you want to use for creating your app. Since we don’t want any pre-created buttons or menus in this app we are just using the Empty Views Activity.
FYI: An activity is one screen of an app. If you are for example creating an app with a login mechanism you would have the following activities:
- Login Activity
- Registration Activity
- Home Activity
The app would probably start with the login activity. On this activity, you could now have two fields for email and password and two buttons. One for new users which would open the registration activity and one login button which would redirect the user to the home activity.
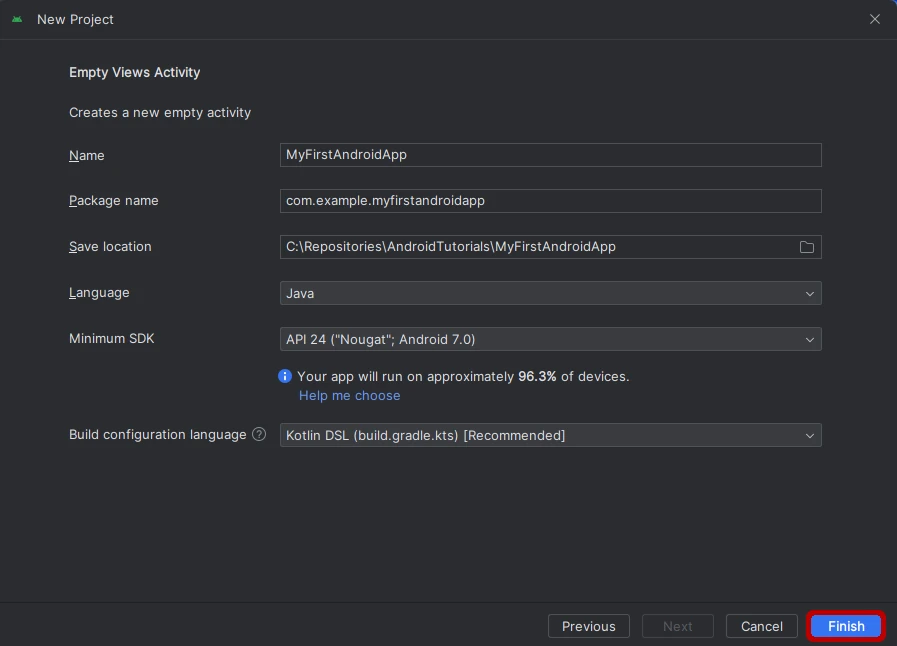
After pressing next you will see the actual configuration screen of your project. There you can change various settings for your app. You can enter whatever you like regarding the name and the package name. This applies also to the save location. However, if you change the directory, no new folder will be created with the project name so the project gets generated exactly in the folder you choose. So don’t choose a parent folder without creating a subfolder.
For the language you should also choose whatever you know the best. For this tutorial, I am choosing Java. The next point is the minimum SDK. This means any device with an Android version below this version won’t be able to download and use this app. A good minimum SDK is API 24 which is already preselected. Below the drop-down menu, you can also see how many smartphones can use this app. The last configuration option is the build configuration language. You can choose between Kotlin and Groovy and since Kotlin is superior we are choosing it.
After every configuration option is set it should look similar to the screenshot below. If this is the case you can start the generating process of your Android app with Java by clicking Finish.
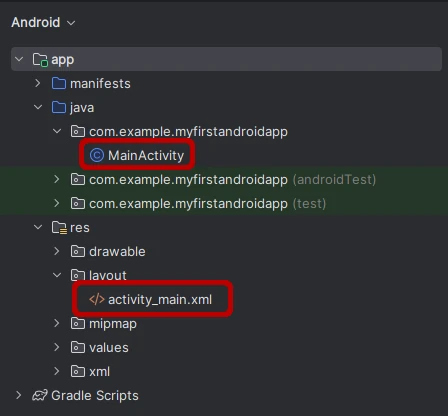
After your project is generated you should locate two important files in the project explorer on the left of the screen. The MainActivity class contains all the programming logic for our activity. The activity_main.xml file contains the information on how your MainActivity will look like.
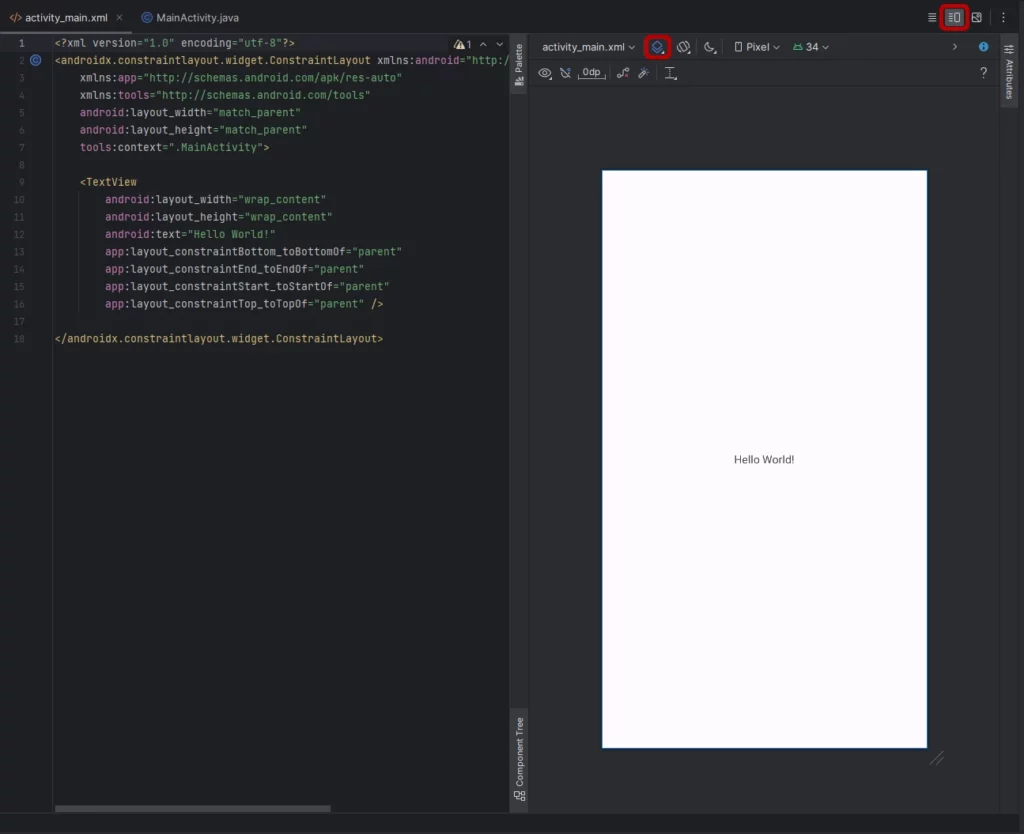
When opening the activity_main.xml you will probably see a white screen with a Hello World! text since this is the default option. But there is also an option to see the code of the actual file side by side with the live preview of it which is mandatory for developing an app. To switch to this view click on the symbol in the top right corner highlighted in the screenshot below. You can also see another highlighted button. With that, you can switch from seeing a blueprint beneath the actual preview of the activity to just previewing the activity. For that, you have to switch to Design only.
Extending the Source Code of Your App
Now that you know the basics we are extending the source code of your Android app with Java a bit so there will be a Button that can be pressed which increases a counter that is displayed in a TextView. For this, we are giving the already existing TextView in the activity_main.xml an ID. An ID is needed so we can access the TextView via the logic inside the MainActivity Java class. To add an ID you need to add the line below inside the TextView tag.
android:id="@+id/counterLabel"
After adding this line we are also adding a Button to the activity with this code:
    <Button
        android:id="@+id/countUpButton"
        android:layout_width="wrap_content"
        android:layout_height="wrap_content"
        android:text="Count up"
        app:layout_constraintEnd_toEndOf="parent"
        app:layout_constraintStart_toStartOf="parent"
        app:layout_constraintTop_toBottomOf="@id/counterLabel" />
Now our activity_main.xml is done and should look like this:
<?xml version="1.0" encoding="utf-8"?>
<androidx.constraintlayout.widget.ConstraintLayout xmlns:android="http://schemas.android.com/apk/res/android"
    xmlns:app="http://schemas.android.com/apk/res-auto"
    xmlns:tools="http://schemas.android.com/tools"
    android:layout_width="match_parent"
    android:layout_height="match_parent"
    tools:context=".MainActivity">

    <TextView
        android:id="@+id/counterLabel"
        android:layout_width="wrap_content"
        android:layout_height="wrap_content"
        app:layout_constraintBottom_toBottomOf="parent"
        app:layout_constraintEnd_toEndOf="parent"
        app:layout_constraintStart_toStartOf="parent"
        app:layout_constraintTop_toTopOf="parent" />

    <Button
        android:id="@+id/countUpButton"
        android:layout_width="wrap_content"
        android:layout_height="wrap_content"
        android:text="Count up"
        app:layout_constraintEnd_toEndOf="parent"
        app:layout_constraintStart_toStartOf="parent"
        app:layout_constraintTop_toBottomOf="@id/counterLabel" />

</androidx.constraintlayout.widget.ConstraintLayout>
The user interface is now done. There is a Button and a TextView. Now we need to access these two components inside the MainActivity.java and work with them.
First of all, we are adding 3 variables to the class.
- private TextView counterLabel; This will be set to our TextView
- private Button counterButton; This will be set to our Button
- private int currentCount = 0; This will work as our counter variable
Then we initialize the TextView and Button variables. This can be done in the onCreate method since this method is only once called at the very start of the activity. To get different components of your XML files you call findViewById(R.id.<IDInsideXMLFile>). So the assignments will look like this.
counterLabel = findViewById(R.id.counterLabel);
counterButton = findViewById(R.id.countUpButton);
The next step is to set the text of the counter label to 0. For setting an initial value there are always two options. The first one is to set it directly inside the activity_main.xml file with the android:text attribute or you can do it via code like this:
counterLabel.setText(String.valueOf(currentCount));
Last, we need to add an onClickListener with which we can override the onClick method to increase our counter and set the new value to our TextView. To do this you can either use a lambda expression or not. That depends entirely on what you prefer to use. You can see the difference below:
counterButton.setOnClickListener(v -> {
    currentCount++;
    counterLabel.setText(String.valueOf(currentCount));
});

counterButton.setOnClickListener(new View.OnClickListener() {
    @Override
    public void onClick(View view) {
        currentCount++;
        counterLabel.setText(String.valueOf(currentCount));
    }
});
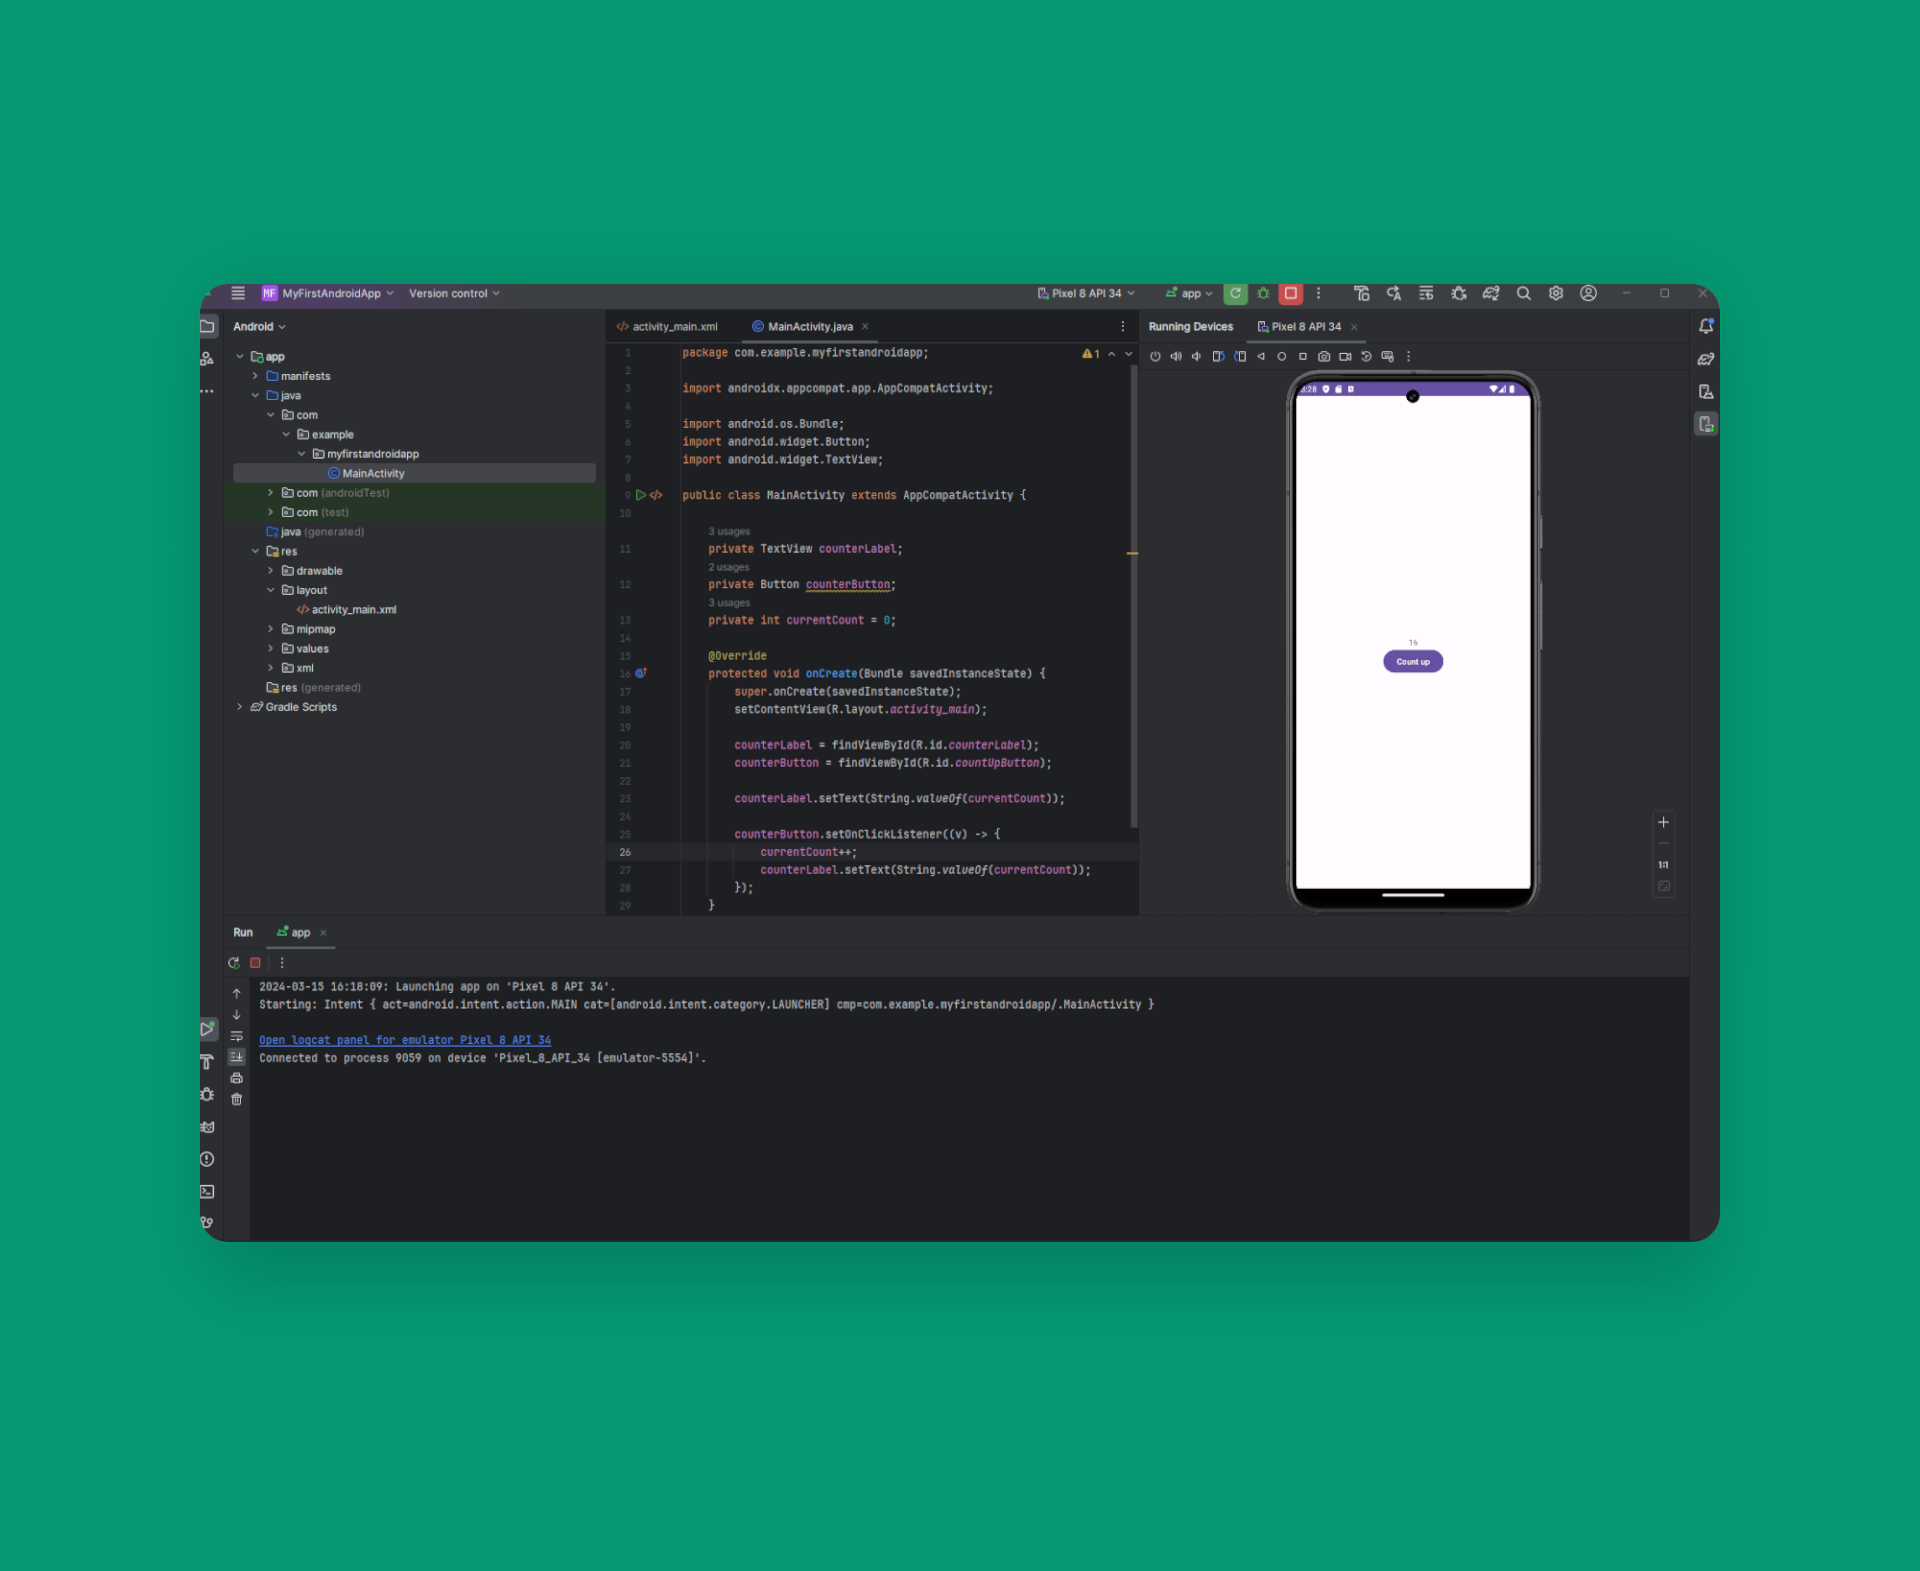
Finally, your finished MainActivity class will look like this:
package com.example.myfirstandroidapp;

import androidx.appcompat.app.AppCompatActivity;

import android.os.Bundle;
import android.widget.Button;
import android.widget.TextView;

public class MainActivity extends AppCompatActivity {

    private TextView counterLabel;
    private Button counterButton;
    private int currentCount = 0;

    @Override
    protected void onCreate(Bundle savedInstanceState) {
        super.onCreate(savedInstanceState);
        setContentView(R.layout.activity_main);

        counterLabel = findViewById(R.id.counterLabel);
        counterButton = findViewById(R.id.countUpButton);

        counterLabel.setText(String.valueOf(currentCount));

        counterButton.setOnClickListener((v) -> {
            currentCount++;
            counterLabel.setText(String.valueOf(currentCount));
        });
    }
}
Always call findViewById after super.onCreate(savedInstanceState); and setContentView(R.layout.activity_main);. Otherwise, it will not work.
Testing Your First Android App with Java
To test your newly created Android app with Java you have two options.
The first one is to use your real mobile phone. You can either connect it via cable or connect via Wi-Fi. To do this you first need to enable the respective debugging mode on your smartphone in the developer settings. This can vary from brand to brand so the best thing is to Google how to do it on your device. After enabling the mode you can connect your device via cable and the smartphone will automatically show up on the devices list, or you use ‘Pair Devices Using Wi-Fi’ from the options in the screenshot below and follow the steps displayed.
The second option to test your Android app with Java is, to use a virtual device. The advantage of a virtual device is, that you can have multiple. So you can test your app on devices with different sizes and Android versions. Furthermore, you can test device categories that you may not even own, like a smartwatch. To learn how to add a virtual device you can click here.
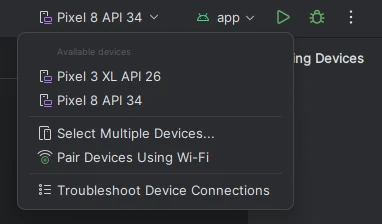
After you have added/selected the correct device you can now click on the play button next to the drop-down list, which is also highlighted in the screenshot below to start your app.
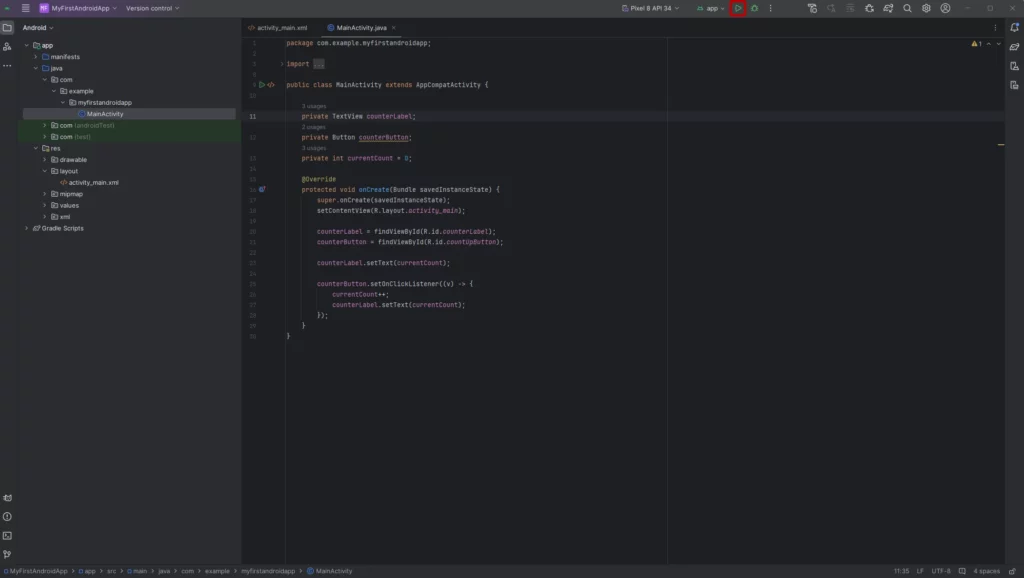
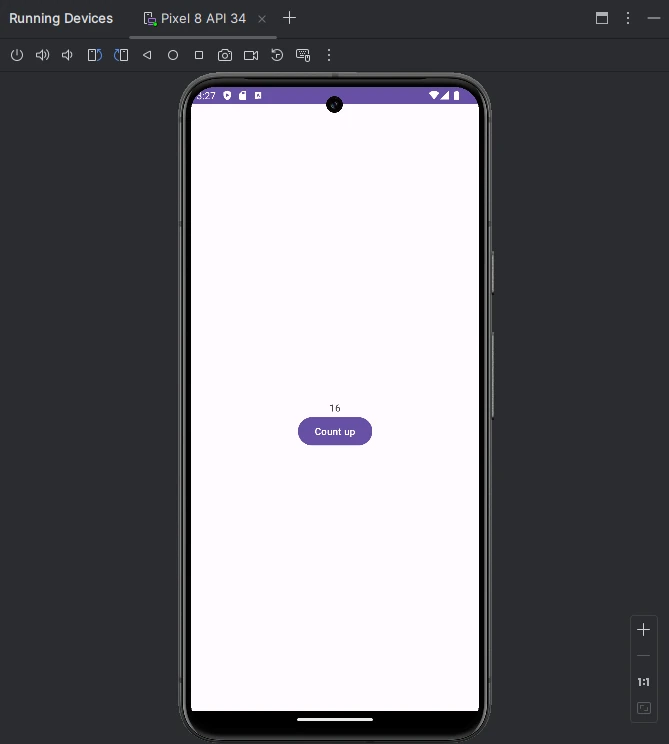
After clicking the button the app will be built. When the build process is finished the virtual device will start and launch your app. If you use your personal device the app will also launch itself. After the application is started on your device it should look like the preview from the activity_main.xml file. To test the logic we implemented you can click on the counter button. You will then see the counter getting increased with each click.
This was the process of creating your first Android app with Java in Android Studio. If you have any problems or questions feel free to comment below. To read more about creating an app in Android Studio you can visit the documentation of Google.


