Hello tech enthusiasts! Welcome back to jasta, your go-to destination for all things tech. Today, we’re diving into how to enable Hyper-V on Windows 11, providing a step-by-step guide to help you accomplish this on your computer. Whether you’re a seasoned tech guru or just starting your digital journey, our straightforward instructions will make the process a breeze. Let’s jump in and enable Hyper-V on Windows 11.
Table of Contents
What is Hyper-V?
Hyper-V is a virtualization platform developed by Microsoft that enables users to create and manage virtual machines (VMs) on their Windows systems. For beginners, think of it as a tool that allows you to run multiple operating systems simultaneously on a single physical machine.
This is incredibly useful for various scenarios such as software testing, running multiple applications that require different environments, or simply isolating workloads for security purposes. With Hyper-V enabled on Windows 11, users can harness the power of virtualization, maximizing their system’s potential by efficiently utilizing hardware resources and expanding the capabilities of their PC. Whether you’re a developer, IT professional, or simply an enthusiast looking to explore different operating systems, enabling Hyper-V on Windows 11 opens up a world of possibilities for seamless multitasking and experimentation.
If you want to find out more, you can read the official Microsoft article about Hyper-V.
Hyper-V vs VMware
Hyper-V and VMware are two leading virtualization platforms, each with its strengths and considerations:
Hyper-V
- Developed by Microsoft, tightly integrated with Windows operating systems
- Included with Windows 11 Pro and Enterprise editions
- Excellent choice for users deeply entrenched in the Microsoft ecosystem
- Seamless integration with other Microsoft technologies like Active Directory
- Relatively straightforward setup and management for Windows-centric environments
VMware
- Renowned for its robust features, flexibility, and cross-platform compatibility
- Offers VMware Workstation Player and Workstation for desktop virtualization
- Widely adopted in enterprises and environments with heterogeneous infrastructure
- Extensive third-party support and a vast ecosystem of add-ons and plugins
- Requires separate installation and licensing; VMware Workstation Player is available for free, while VMware Workstation Pro is a paid version
Ultimately, the choice between Hyper-V and VMware depends on factors such as specific requirements, existing infrastructure, and personal preference. Both platforms excel in enabling users to create and manage virtual machines efficiently, catering to a diverse range of use cases and environments.
You can learn how to install and set up a virtual machine with VMWare Workstation Player or Pro here.
Enable Hyper-V on Windows 11
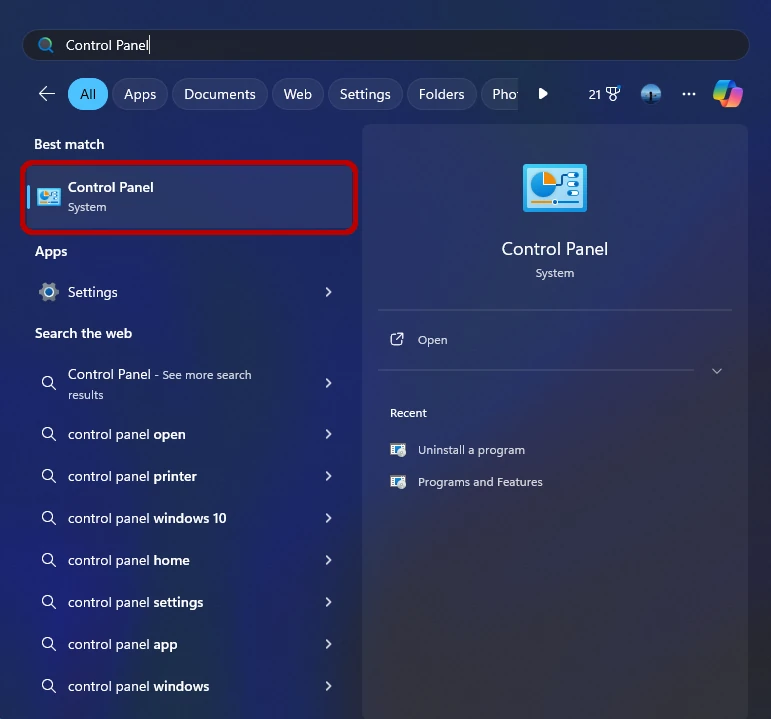
To enable Hyper-V on Windows 11 you first have to visit your control panel. You can do that by pressing the Windows key on your keyboard and entering Control Panel.
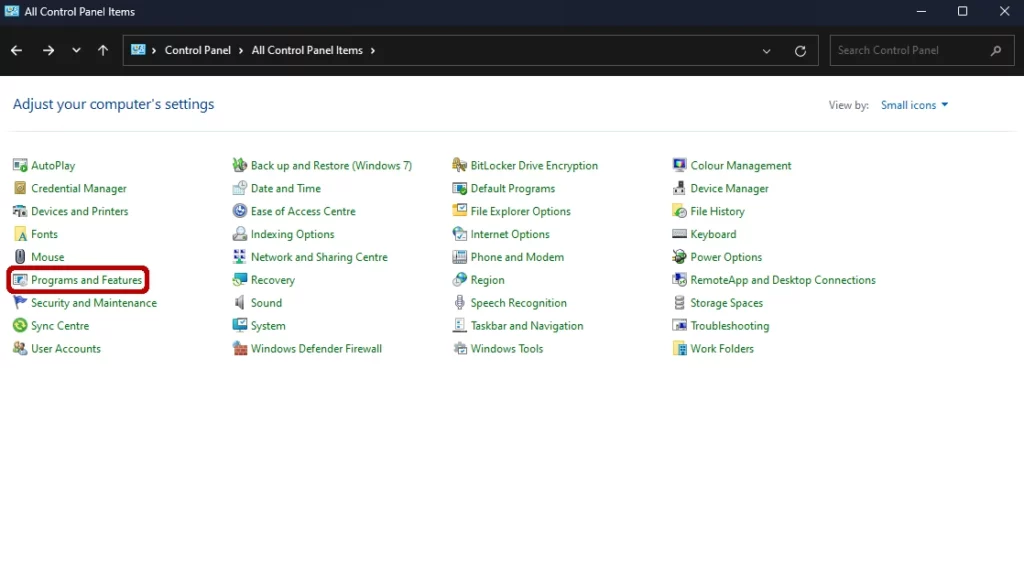
After opening the panel you now either see many icons or categories. If you see just categories, you have to click on the Programs category in the bottom left corner. If you see many icons you have to search for the label Programs and Features and click on it. Both options can be seen in the screenshots below.
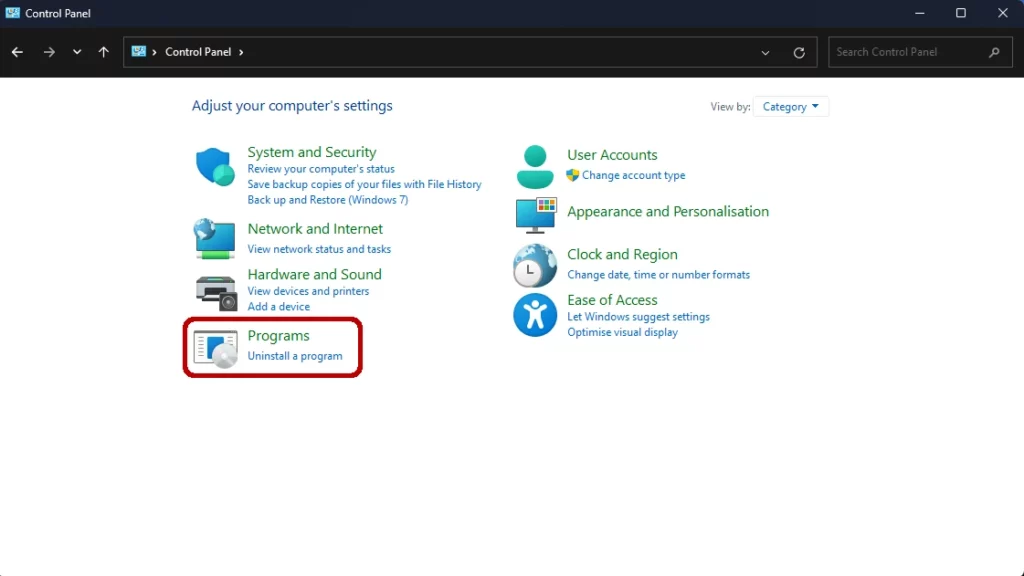
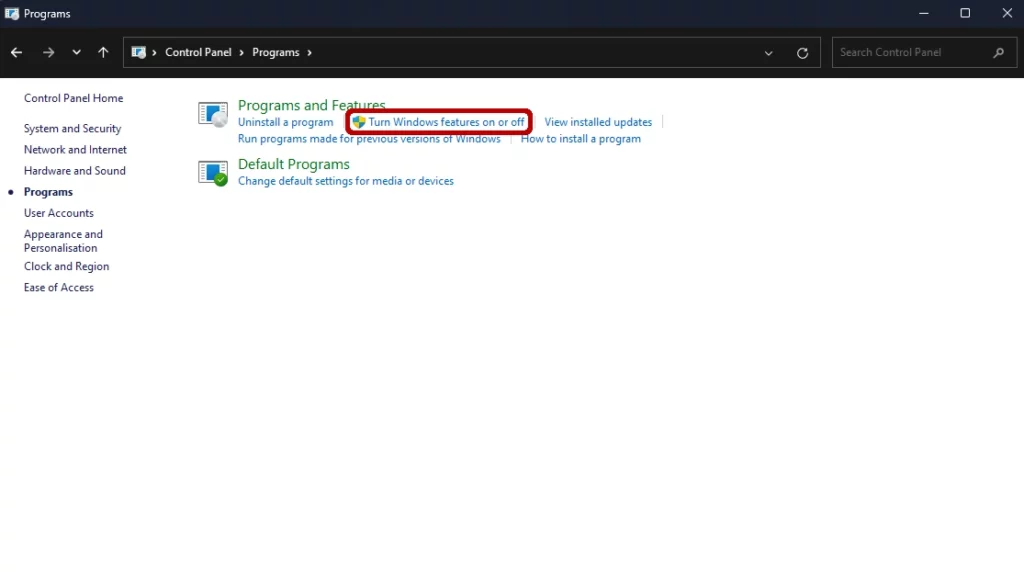
If your view was set to categories and you clicked on Programs, you can now see the screen from below. There you have to click on the red marked area with the text ‘Turn Windows features on or off’.
When you have set your view to icons your windows will look like the screenshot provided below. There you also have to click on the red marked area with the text ‘Turn Windows features on or off’.
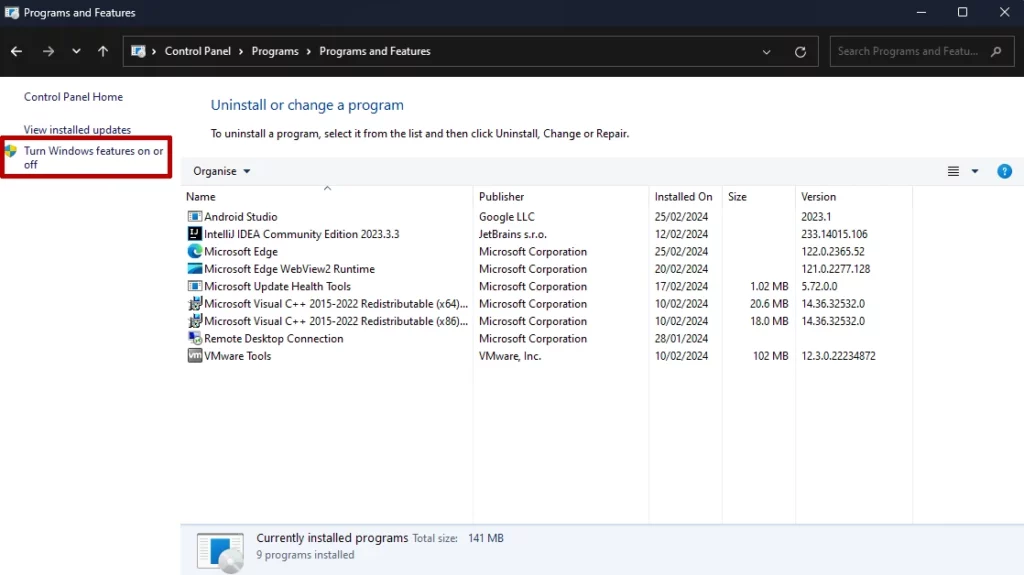
Whether your view was showing categories or items, you will now see a small window that popped up, where you can see all available Windows features that can be activated or deactivated. In that list, you need to search for the entry which says Hyper-V. It should be located at the very beginning.
If you have found it, you just need to click on the checkbox next to Hyper-V so that it is highlighted and confirm your choice by pressing OK in the bottom right corner.
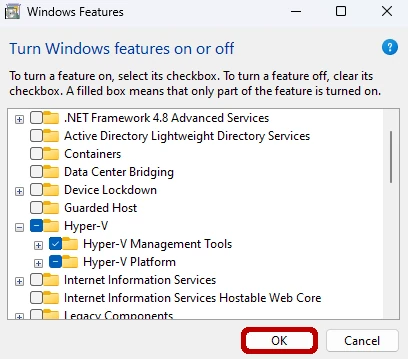
After pressing the OK button and confirming your choice, Windows will now enable Hyper-V. To complete the activation a restart of your computer is mandatory.
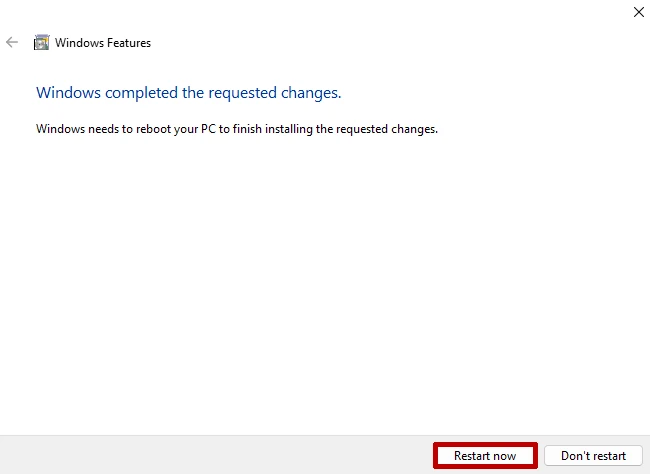
After restarting everything necessary is done. You have now completed all the steps to enable Hyper-V on Windows 11!


