Hello tech enthusiasts! Welcome back to jasta, your go-to destination for all things tech. Today, we’re diving into how to easily enhance your project management with GitHub Desktop, providing a step-by-step guide to help you accomplish this on your computer. Whether you’re a seasoned tech guru or just starting your digital journey, our straightforward instructions will make the process a breeze. Let’s jump in and set up GitHub Desktop.
Table of Contents
Downloading and Setting Up GitHub Desktop
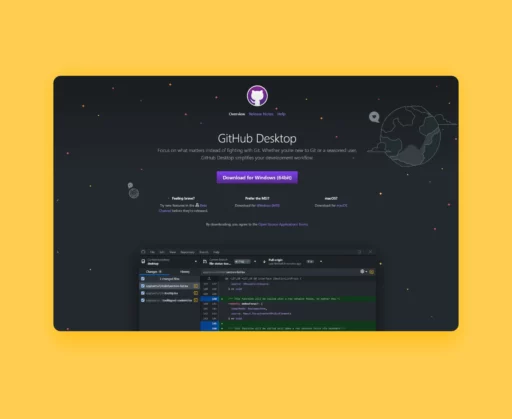
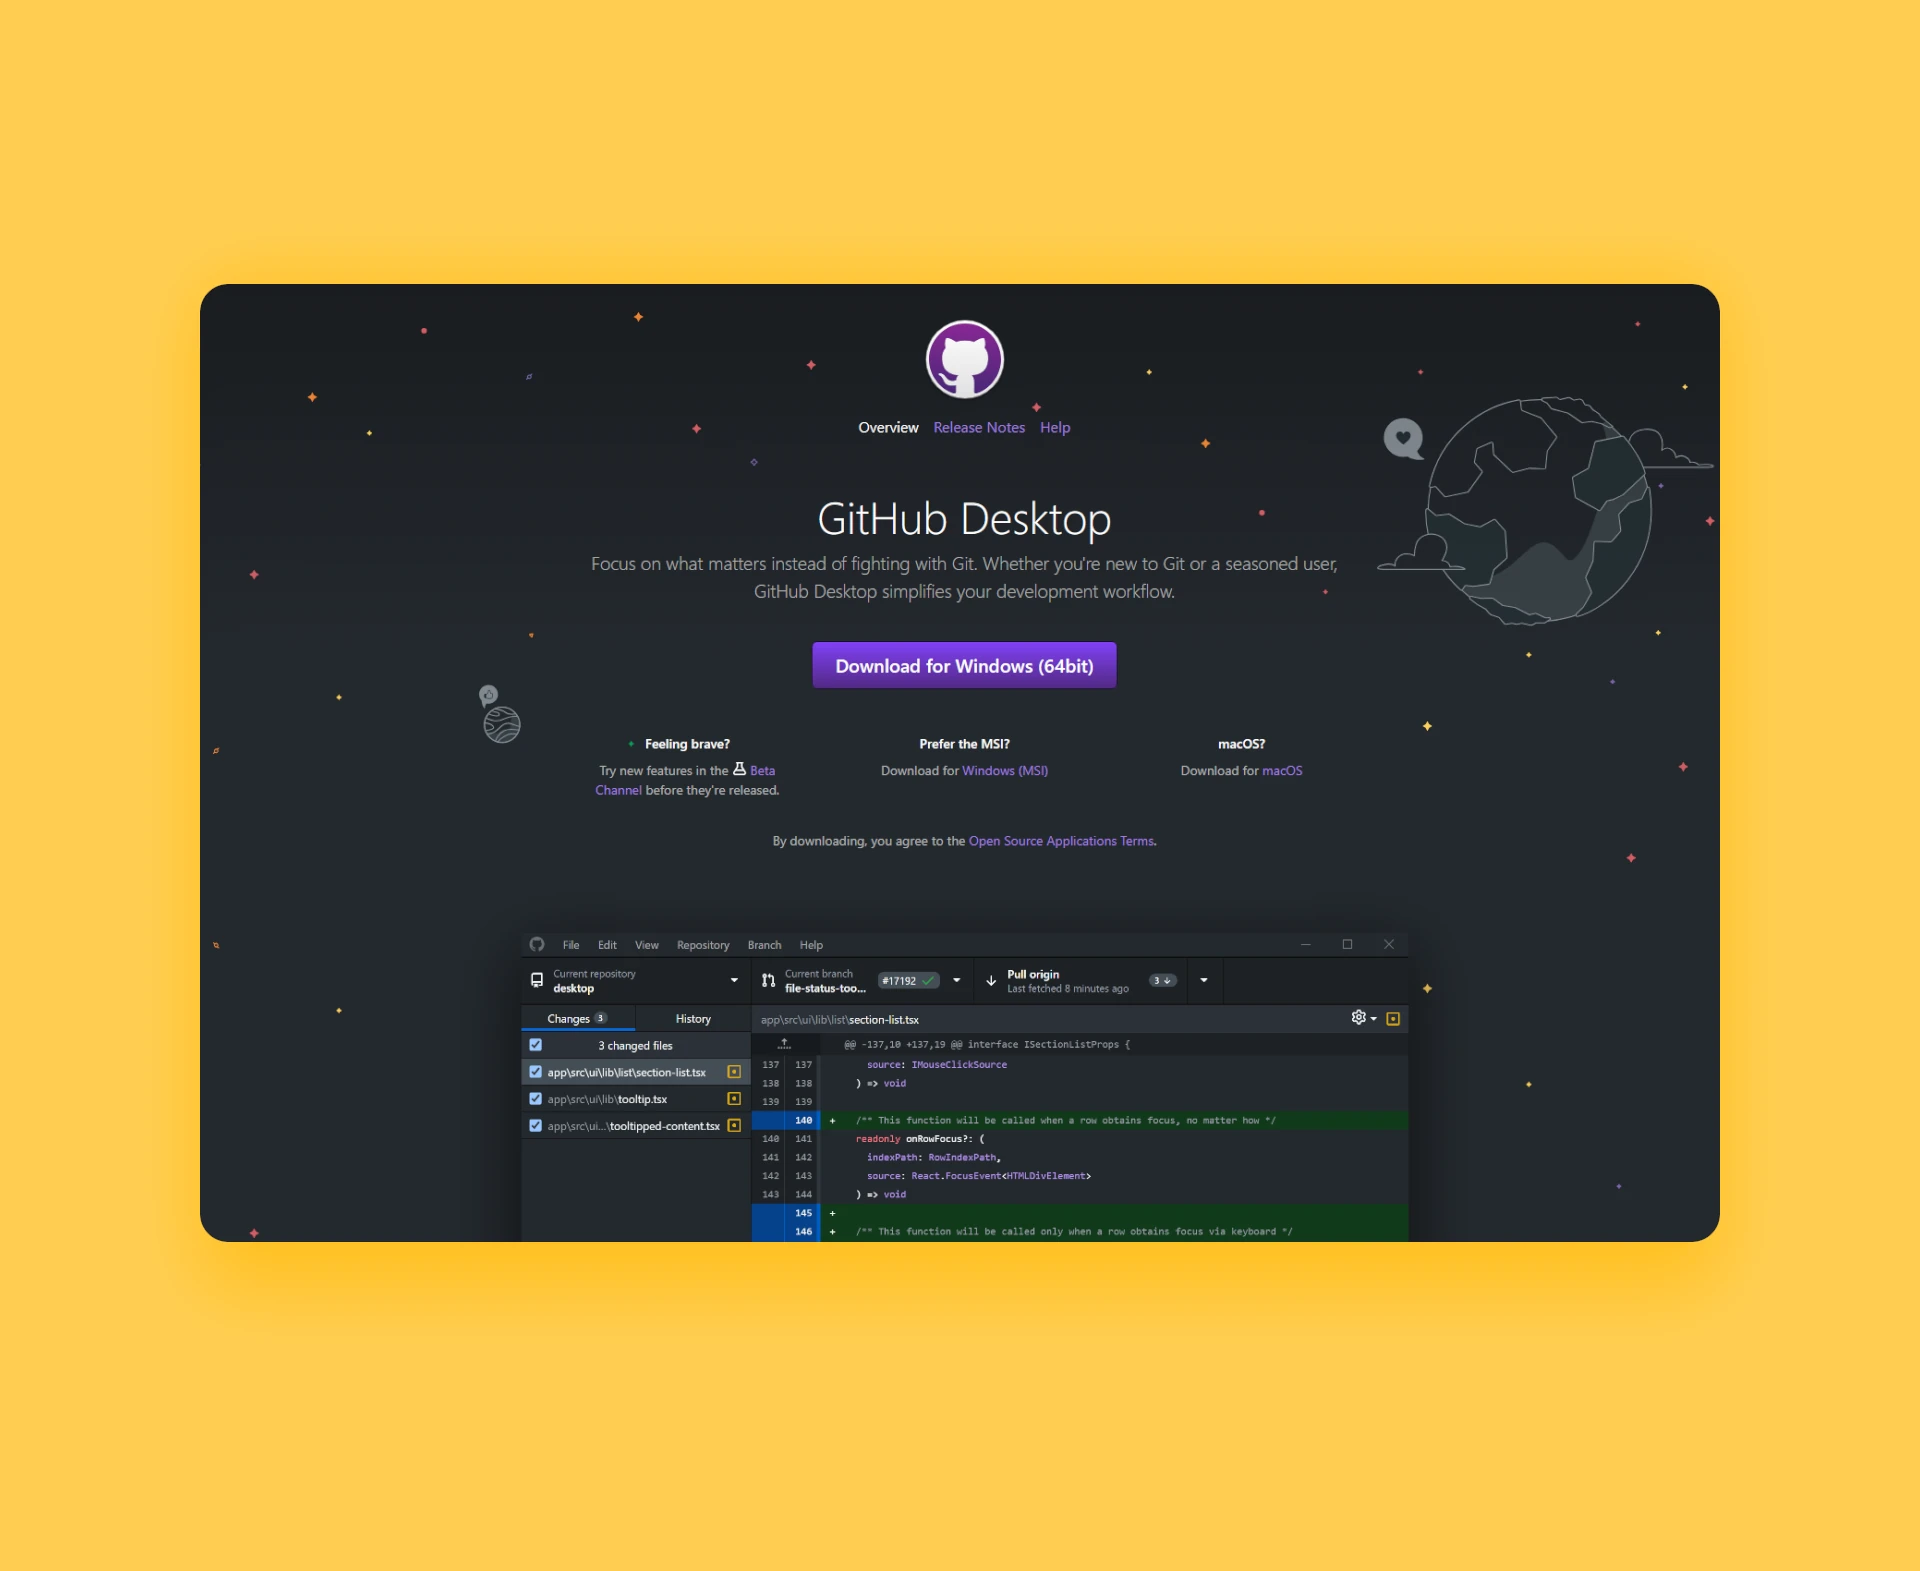
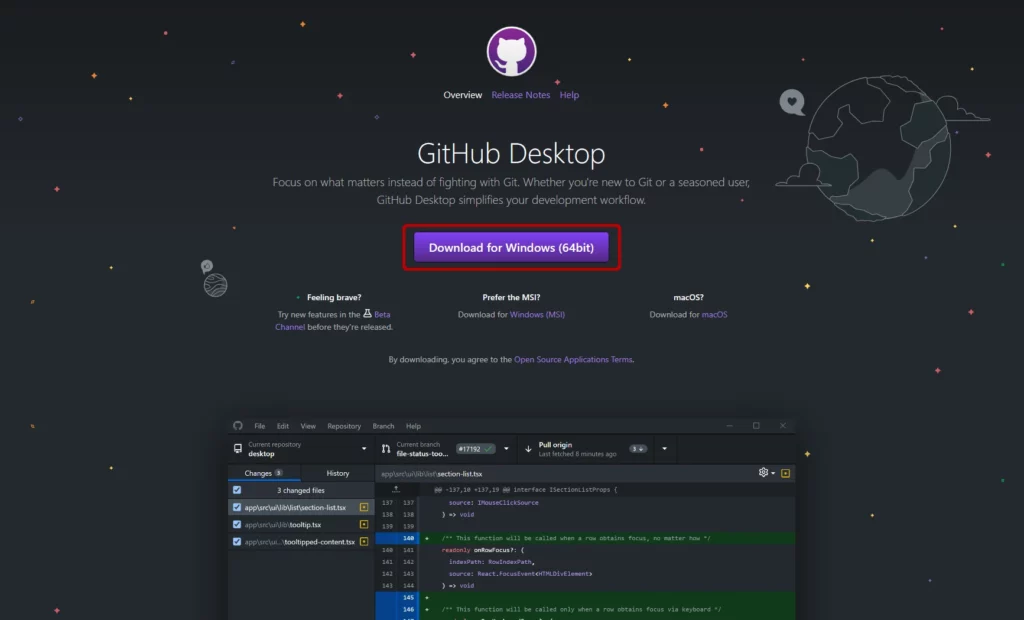
To start managing your projects with GitHub Desktop you first need to download the setup file. This can be done via the official GitHub Desktop Website. You can click here to open it. After the Website has loaded click the Download button highlighted on the screenshot below.
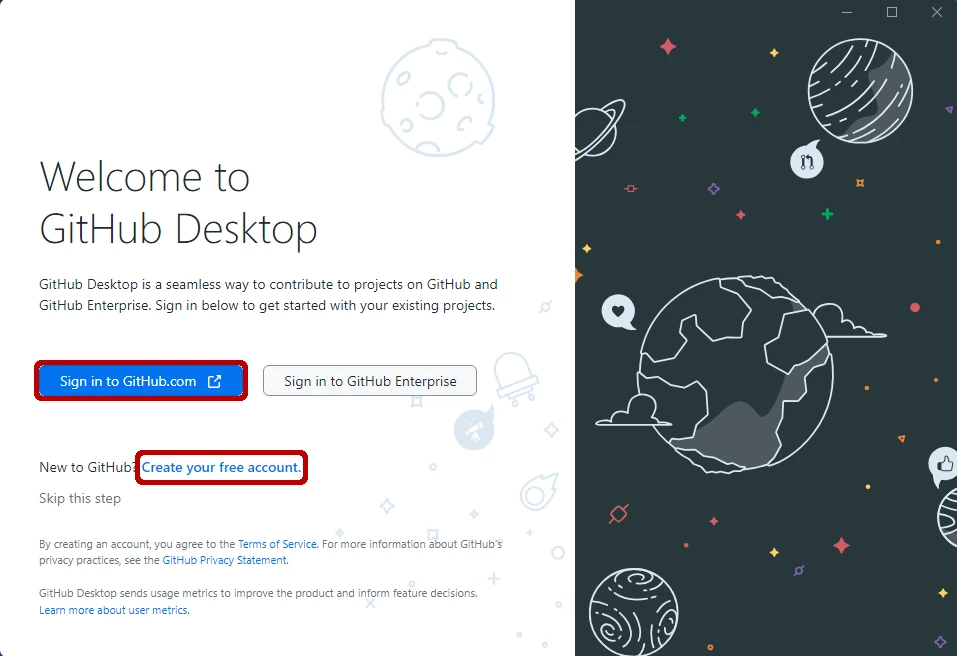
After downloading the setup executable file you can open and run it. When the setup is started up it looks like in the picture below. Now you have two options. The first is to log in with an already existing account which we will do in this tutorial. The second option is to create a new free account on GitHub. You can also create an account on the github.com website first and then follow the steps described below.
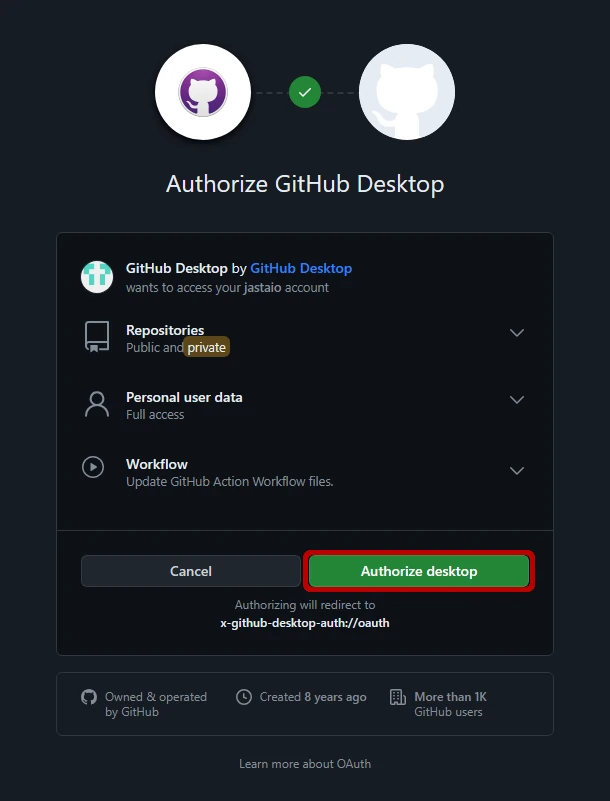
After clicking on Sign in to GitHub.com you are redirected to the GitHub website where you have to authorize GitHub Desktop rights to your account. To do this press ‘Authorize desktop’ on the right. If you don’t see the screen from below you have to log in to your account first.
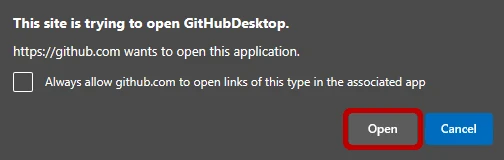
After authorization, your web browser will ask you for permission to open GitHub Desktop again. This message can vary from browser to browser. In Microsoft Edge, you need to click on Open. If you want to always open GitHub Desktop automatically in the future you can also check the checkbox above the buttons.
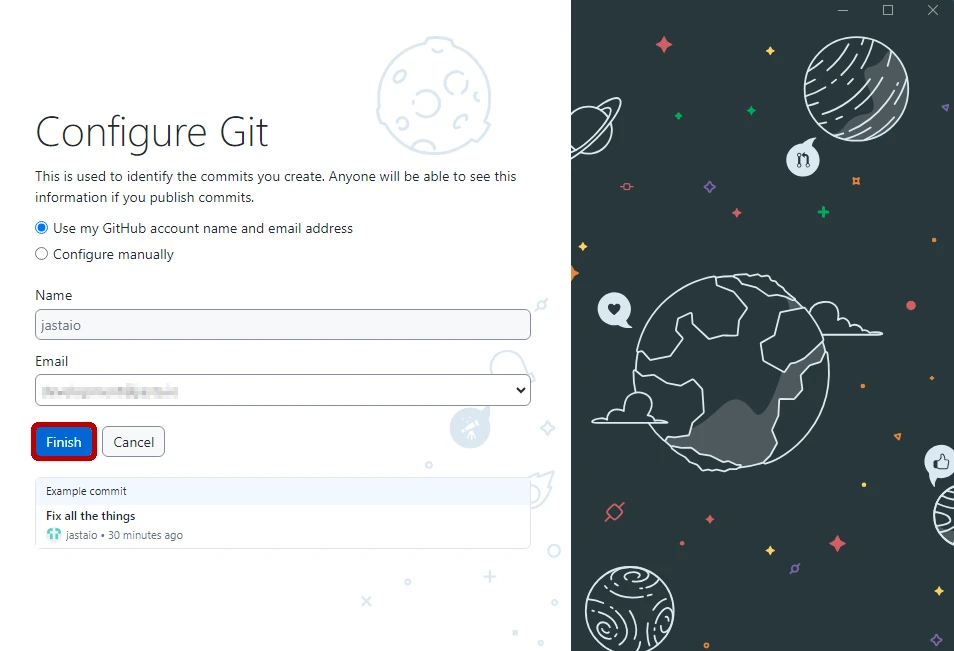
After opening GitHub Desktop again your Git configuration will be displayed on your screen. There may be an auto-generated email address in the email field. You can change that back to your default GitHub email address by clicking the arrow next to it. When everything is configured you can hit Finish.
Managing Your Projects with GitHub Desktop
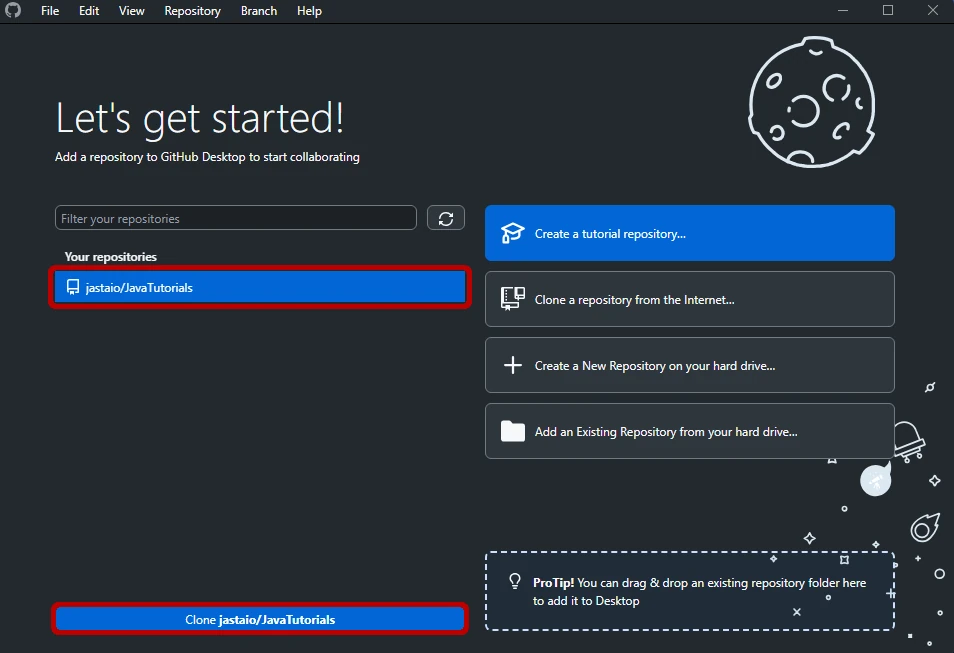
To start managing your projects with GitHub Desktop you need to clone a repository. You can see your existing repositories on the left side of the screen. There you can select one and click on Clone <YourRepositoryName>. If you don’t have a repository yet you can also try the options on the right side of the screen. With ‘Create a New Repository on your hard drive…’ a completely new folder will be created and used as a repository. With the button below you can transform an existing folder to a repository.
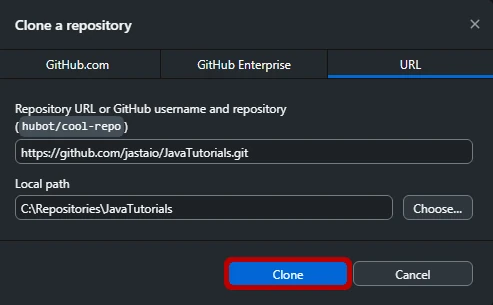
After pressing Clone, you will see another dialog popping up. There you can find the GitHub address of the repository and the location where you want to place it on your hard drive. Adjust it to your needs and confirm your choice with a final click on Clone.
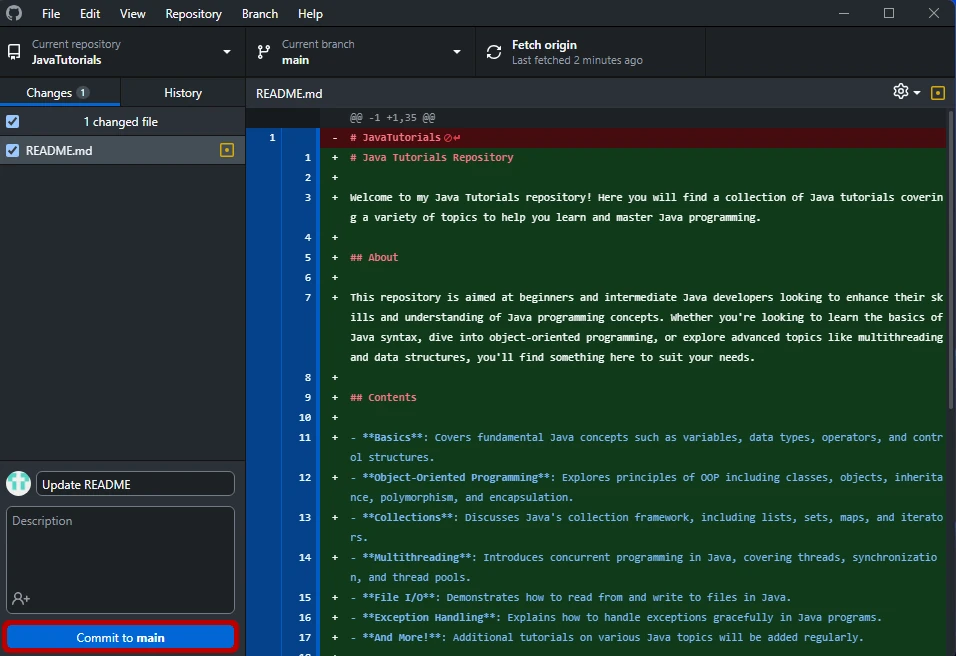
You can start committing to the repo after the cloning process. To commit something to a GitHub you first need some changes. The best practice is to create or update the ReadMe.md file. After saving the file, GitHub Desktop automatically detects changes and will display them to you. You can see all the changes made in the currently selected file on the right. On the left side, you can see all modified files. There you can also deselect files that you don’t want to commit. On the bottom of the left side, you will see the field for the commit message, the description and the Commit button.
You can commit your changes to different branches which can be selected at the top of the screen. Since this is just the ReadMe file it will be committed to the main branch. After you have made sure that you have just selected the files you want to commit, selected the correct branch, entered a commit message and optionally added a description you can click Commit.
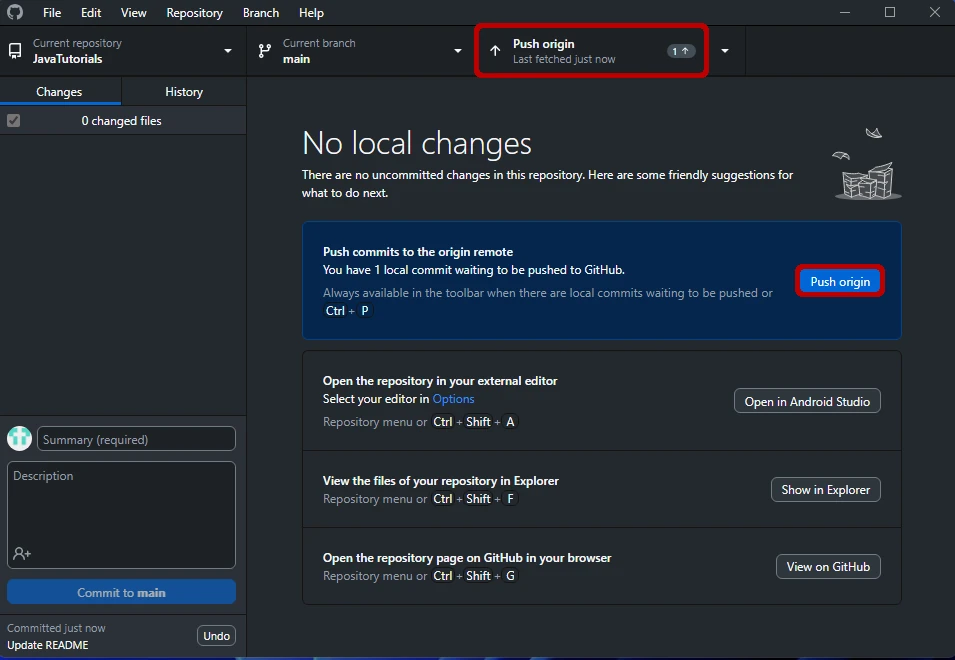
After pressing commit you have to push the changes to the repository. This can be done either with a click on the Push button in the blue box, with CTRL+P or a press Push at the top of the view. If you don’t see the Push origin at the top you can click on the arrow to switch modes. Now your changes are pushed to the repository.
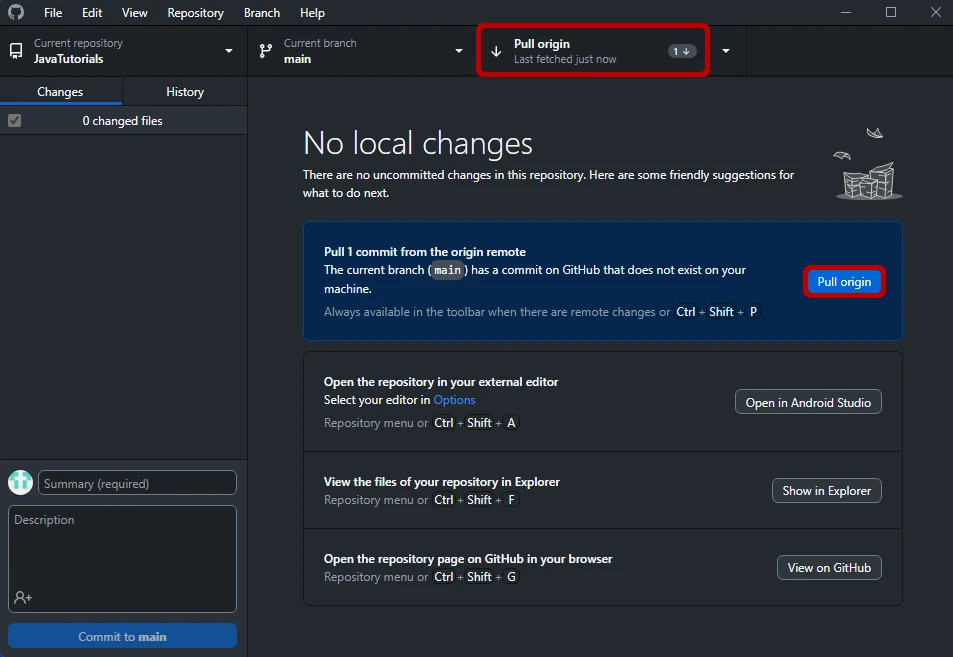
When there are multiple team members or you have made changes on the GitHub web app you want to have those changes locally as well. This is also done with a click on Pull in the blue box, CTRL+SHIFT+P or with the top menu.
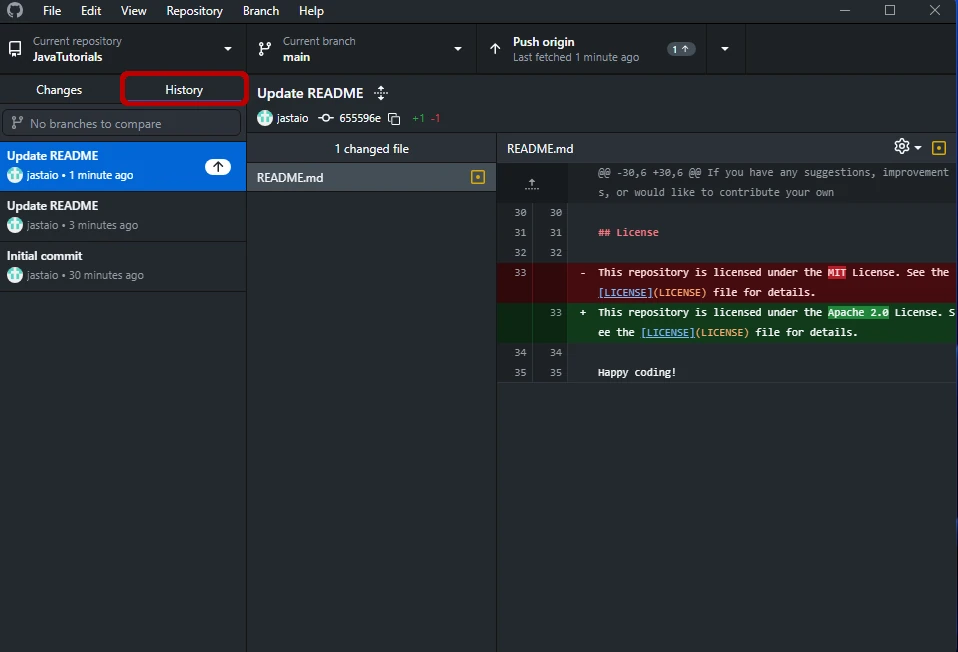
To see the repository history in GitHub Desktop you can press History on the left side. You can see every change with the included files and the exact changes depending on the selected files.
With the top menu, you can switch between repositories and branches to see exactly where what changed. With these features, monitoring and managing your projects with GitHub Desktop can be done by everyone.
Now you should be able to manage your Java, Android and many more projects easily. If you have any problems or questions feel free to leave a comment.