Hello tech enthusiasts! Welcome back to jasta, your go-to destination for all things tech. Today, we’re diving into how to add a powerful virtual device in Android Studio, providing a step-by-step guide to help you accomplish this on your computer. Whether you’re a seasoned tech guru or just starting your digital journey, our straightforward instructions will make the process a breeze. Let’s jump in and add a powerful virtual device in Android Studio.
Table of Contents
Why You Should Have One or More Virtual Devices
After developing mobile applications you will ask yourself how to test your app. There are two options: The first option is, to load your program on your smartphone. The benefits are clear. Once uploaded on your phone you can show it to friends and family members but there are also downsides. The phone must be either connected via cable or wirelessly. Additionally, debugging has to be enabled in the developer settings. Furthermore, it always has to be nearby and the uploading process often takes quite a long time.
With a virtual device, you don’t need to have your phone always with you to test your mobile applications. You can press ‘Run’ inside Android Studio and a virtual smartphone will be powered up where your app gets deployed. Also with the virtual device, you can simulate different things like a bad internet connection.
Another big advantage is, that you can have multiple virtual devices with different screen sizes and Android versions, which is extremely useful for developing apps, which have to work for older phones and should also look good on foldable phones or phones with rather small displays.
Add a Powerful Virtual Device in Android Studio
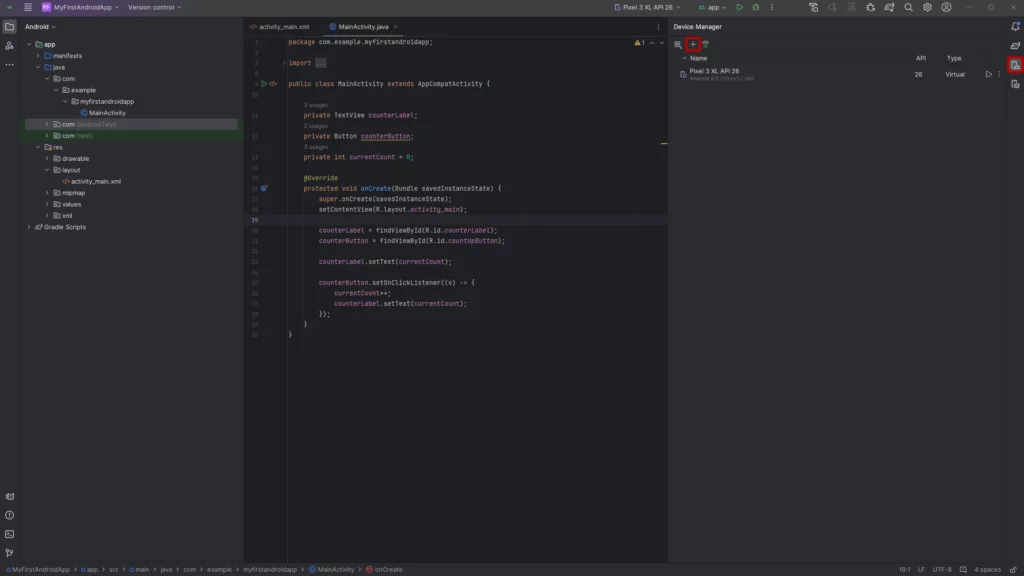
To add a powerful virtual device in Android Studio the first thing you need to do is to check if Hyper-V is enabled. To learn how to enable it, you can click here. After you have enabled it, you need to open the device manager in Android Studio. This can be done with the menu on the very right in Android Studio. There you have to click on the icon with a smartphone and the android logo. You can see the location in the screenshot below. After opening it, you have to click on the plus symbol to add a new powerful virtual device in Android Studio.
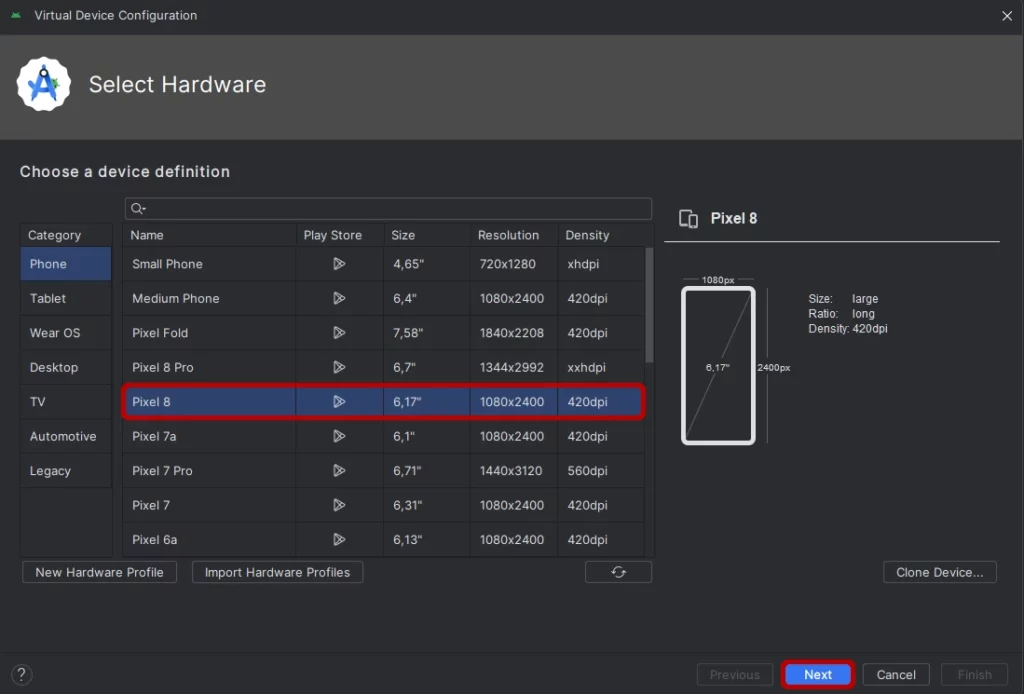
After clicking on the plus icon, a new dialog will be displayed on your screen. Now the real process to add a powerful virtual device in Android Studio begins. First of all, you have to decide which device you want to create. You can choose from different categories like phones, tablets, watches, or even TVs. In this tutorial, we are using the Google Pixel 8 since the size is rather common. After choosing the device you can confirm your selection with a click on Next.
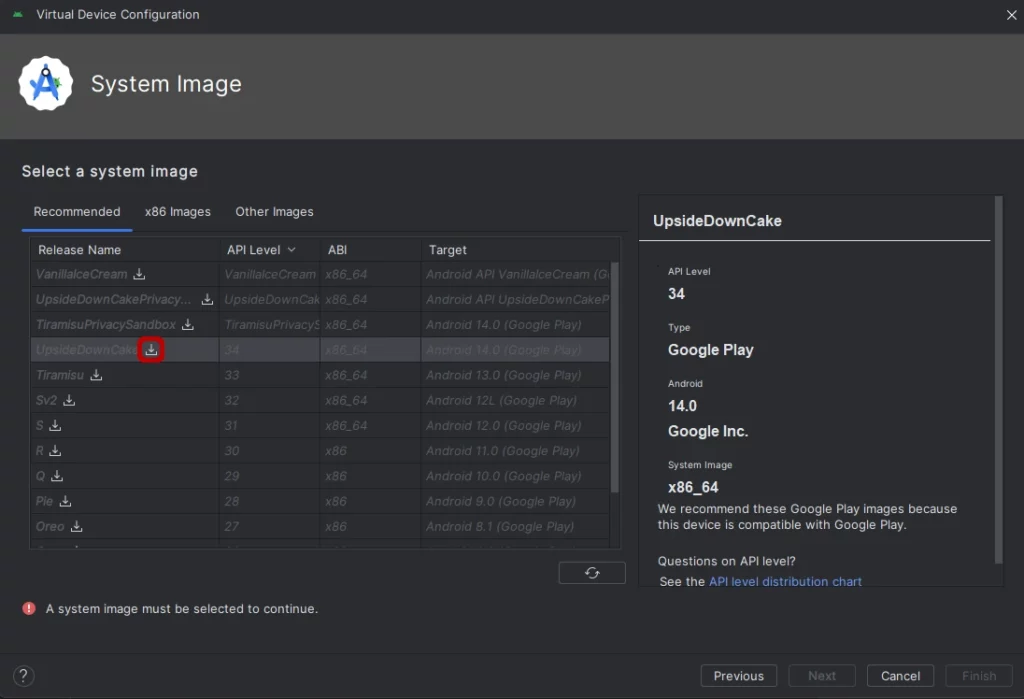
In the next dialog window, you can choose your desired Android version for your new virtual device in Android Studio. If you have already downloaded the desired version, you can select it and click on next. Otherwise, you have to click on the small download icon next to the Android version name. In this case, I am choosing the newest version, 14.
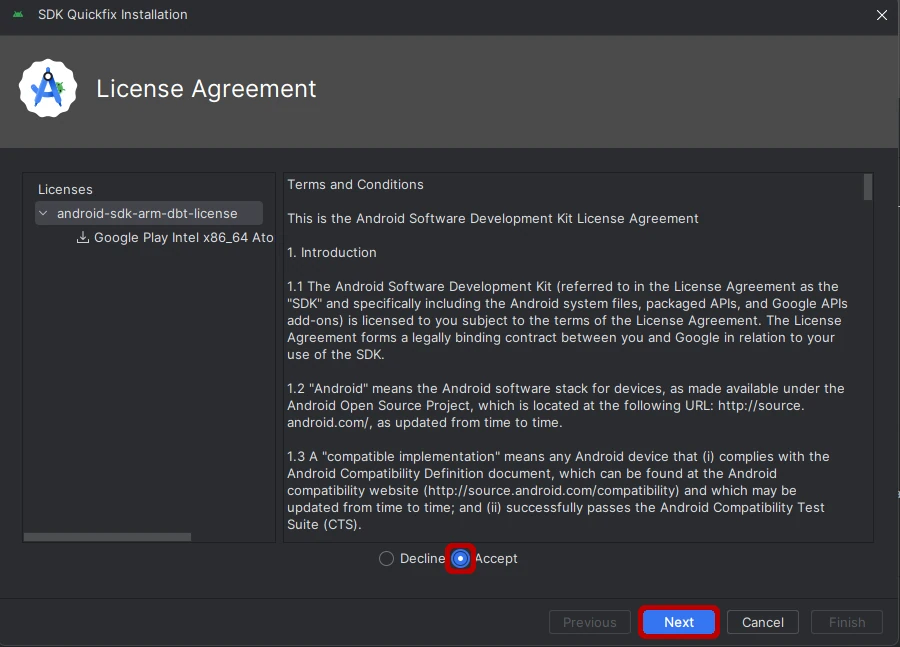
After pressing on download another window will appear where you must accept the license agreement. Just select Accept and press Next to start downloading the SDK.
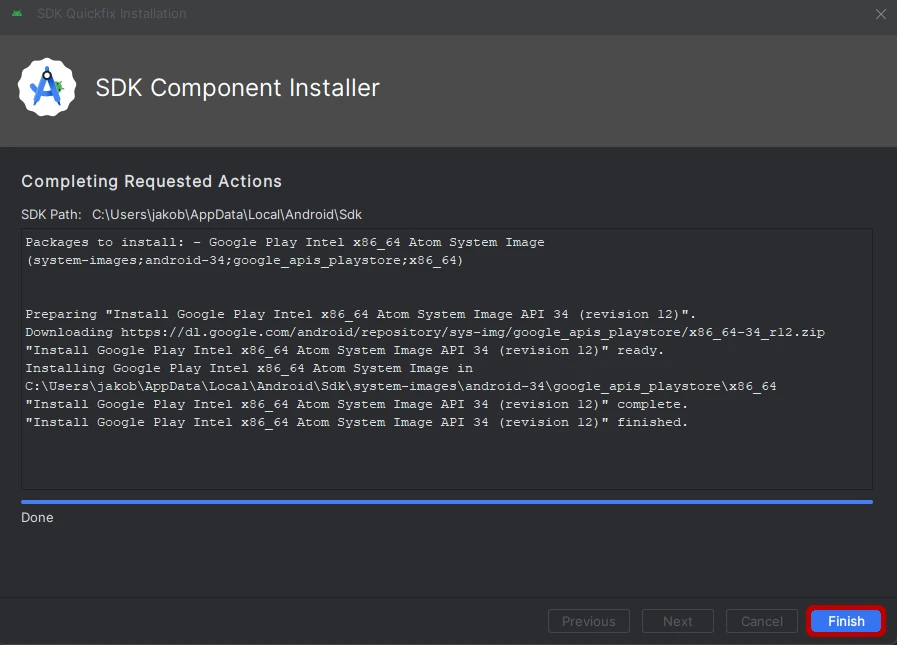
The download will take some time. After it is finished you can press the Finish button in the bottom right corner of the download dialog.
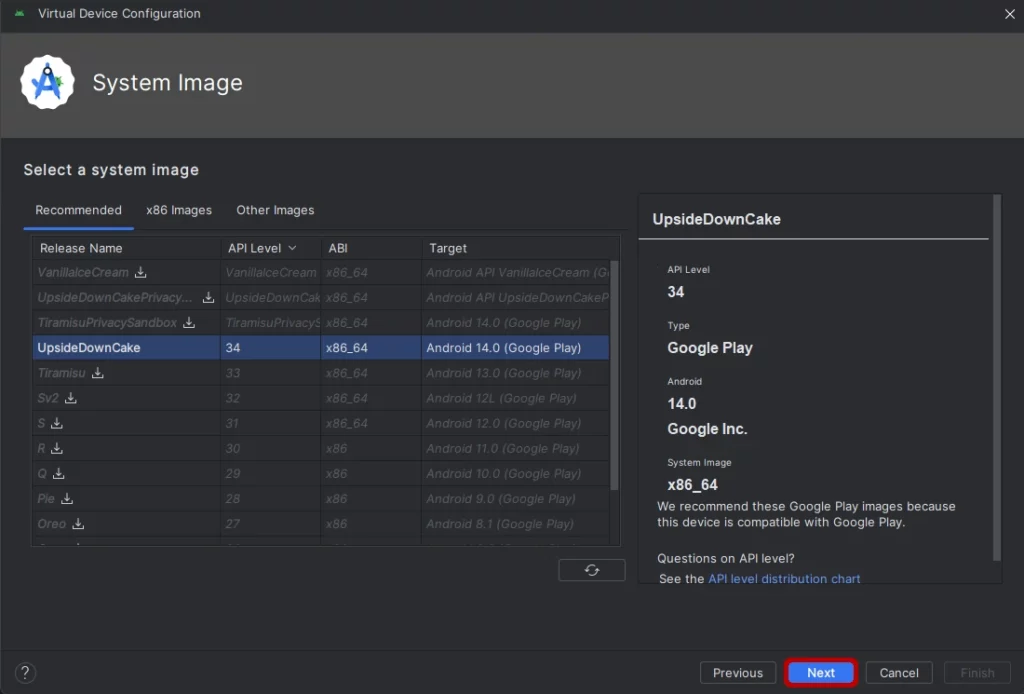
After clicking on Finish you will be back at the window where you can choose the desired Android version. You can now select the downloaded version and confirm the selection by pressing Next on the bottom.
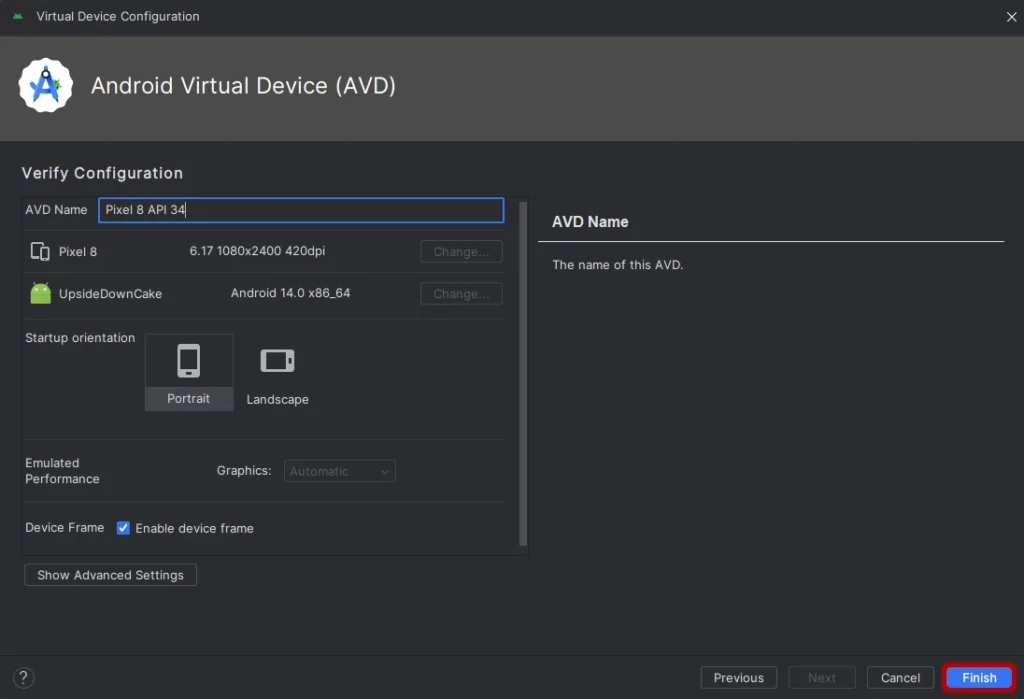
After clicking Next you will see the last dialog to create a virtual device in Android Studio. There you will see a quick overview of your selections and you can also give the device a name. I would recommend that you include the API version (Android version) in the name, so you quickly know what version the device is running on. After you have checked your previous selections and named your device you can finish the process to add a virtual device in Android Studio with a click on the Finish button.
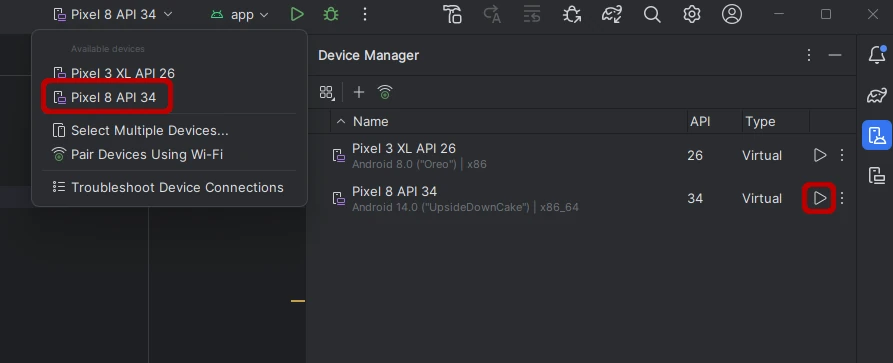
Now your device will show up in the device overview of the device manager. You can start the virtual smartphone directly by launching your app with the play icon on the top or you can start the device without starting your mobile application via the play button next to your device inside the device manager.
Problem: Black Circle on the Screen in Addition to the Camera
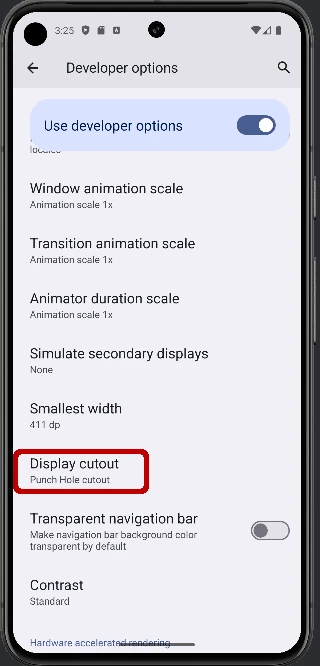
Sometimes there might be a problem after you’ve added a powerful virtual device to Android Studio – a black circle is displayed on the screen in addition to the camera punch hole. This is because a display cutout is activated in the developer options of the device. To deactivate it you first have to activate the developer options. You can do this by opening the settings on the smartphone, then clicking on ‘About phone’ and scrolling down to ‘Build number’. You have to click on Build number 7 times to enable the developer options. After clicking on it that many times you will see a message on the screen that the developer options are now enabled.
After the activation, you have to go back to the start of the settings. Now scroll down to ‘System’ and open the ‘Developer options’. You now have to search for ‘Display cutout’. The setting is located approximately two-thirds of the way up the menu. After you have found it you can click on it and select ‘Device default’ so only the normal camera punch hole is visible.
Now everything should be working without any problems. If you have any troubles or questions feel free to leave a comment or visit the official documentation of Google.


