Hello tech enthusiasts! Welcome back to jasta, your go-to destination for all things tech. Today, we’re diving into how to create a powerful Java Web Application with Spring, providing a step-by-step guide to help you accomplish this on your computer. Whether you’re a seasoned tech guru or just starting your digital journey, our straightforward instructions will make the process a breeze. Let’s jump in and create a powerful Java Application with Spring.
Table of Contents
Create your Project with Spring Initializr
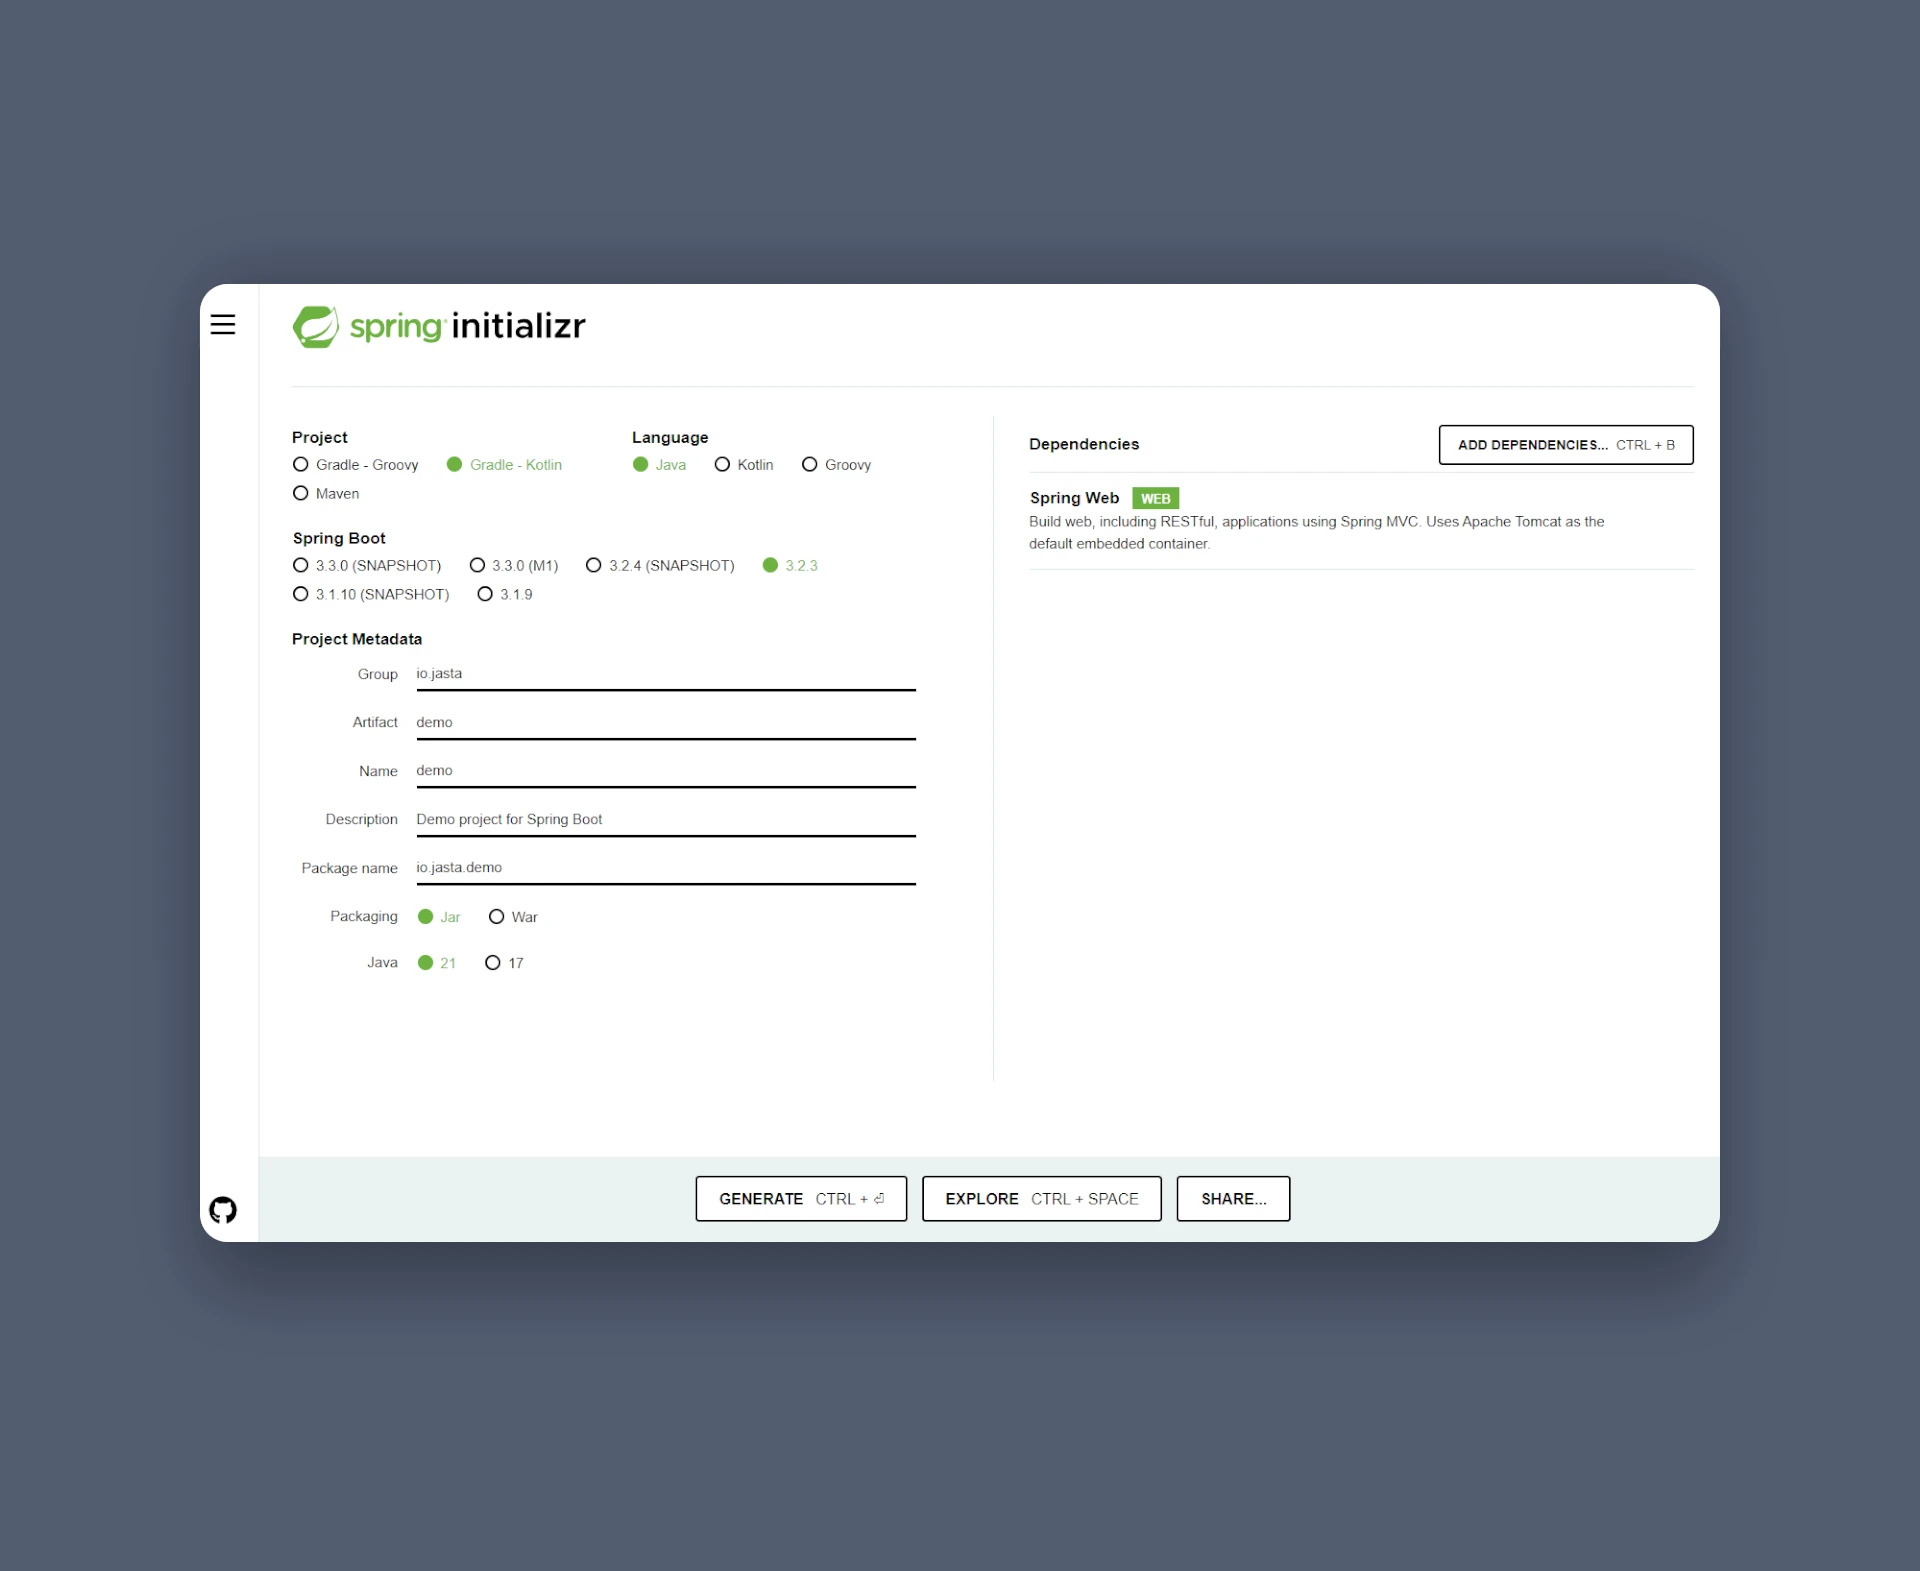
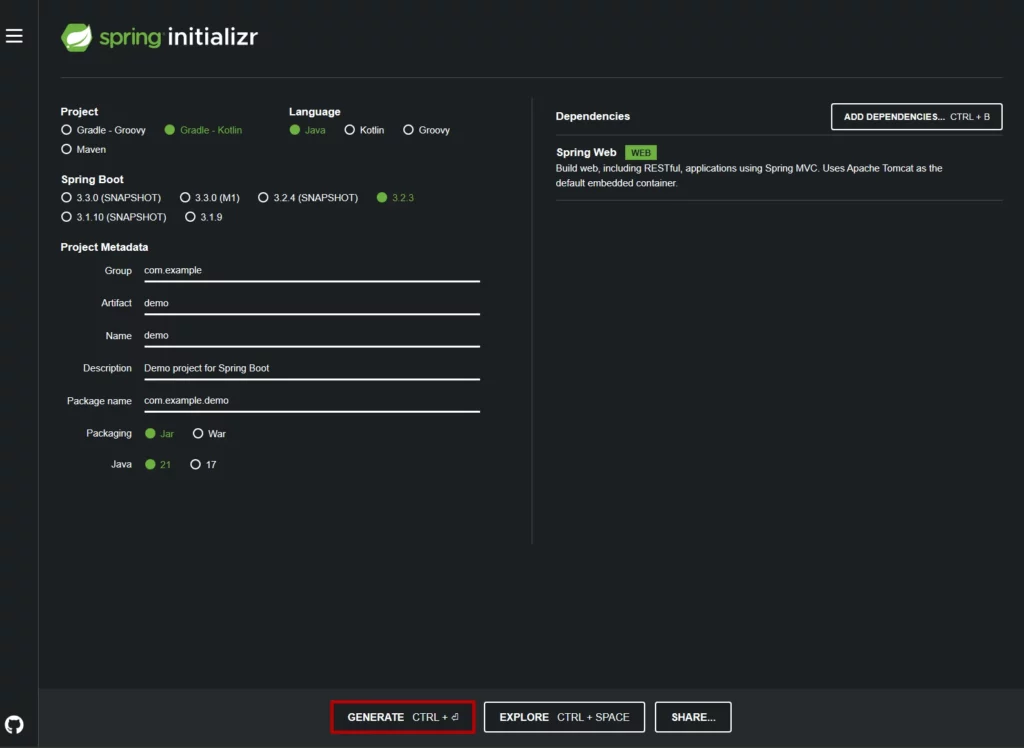
To create a Java web application with Spring you first have to create the project via the Spring Initializr. There you have a quit similar screen to the IntelliJ IDEA project creation window.
First you have to set the build tool with a corresponding language. As in the Java tutorials you should pick Gradle with Kotlin, since Gradle and Kotlin are supiror to Maven and Groovy. After choosing the build tool you have to choose the language for the Project, which in this case is Java. Below you can select the wanted Spring Boot version. It is recommended to just use the most revent final version which in this case is 3.2.3.
After setting the build tool, language and Spring Boot version you now have to enter some information about your Java web application with Spring. You can change these as you like, but you can also just leave all the prefilled values or just give the project another name.
Below these settings you can set the packaging and Java version. For the packaging I would recommend to just use the already selected option, Jar. For the Java version it is the best to pick the newest one. In this case this is 21.
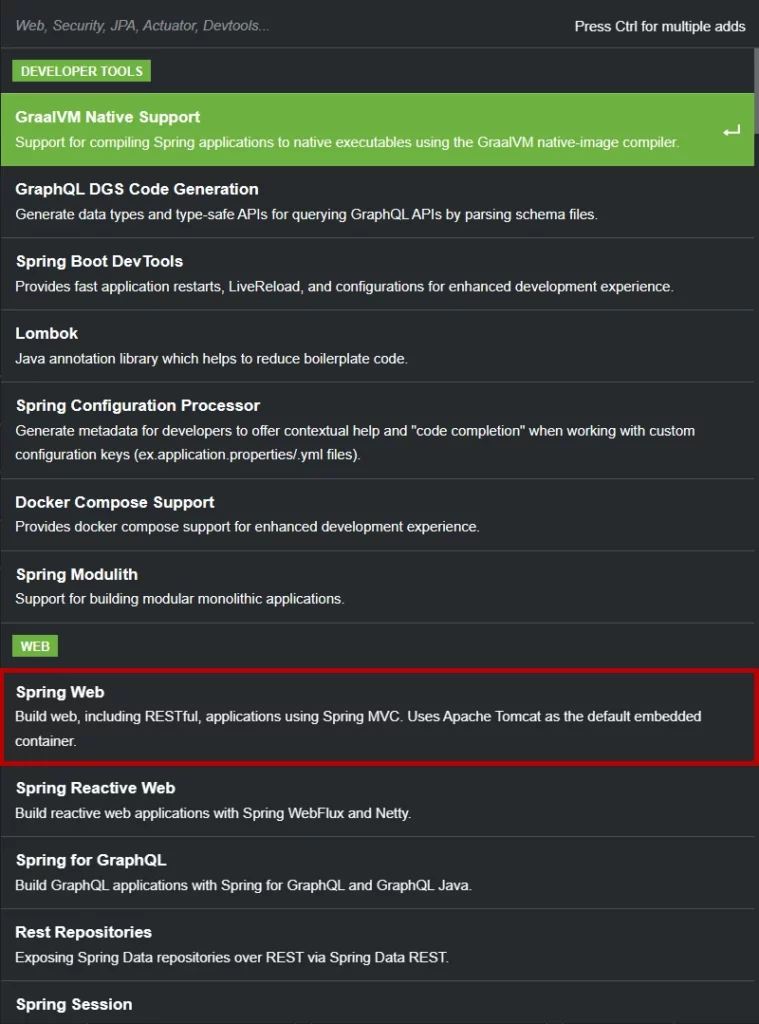
On the right side of the Spring Initializr you can see the dependencies for the project. Because we are later adding some REST methods, we are going to add a certain dependency. For that you have to click on ADD DEPENDENCIES or press CTRL + B to open the dependencies window. There you have to select ‘Spring Web’ which is also marked in the screenshot below.
Now after filling out all necessary information to create the Java web application with Spring, your Screen should look similar to the screenshot below. If this is the case, you can now click on GENERATE button on the bottom or start generating with CTRL + ENTER to generate the project and download it automatically.
Import your Java Web Application with Spring into IntelliJ IDEA
After generating and downloading your project, you now have a zip file inside your Downloads folder. If this is the case, you should now relocate the zip file to a folder where you want to locate the project and unzip it there. After unzipping it, you can now open IntelliJ IDEA.
There are two different methods to open your Java Web application with Spring depending if you have already opened a project or not.
Open a Project from the starting screen
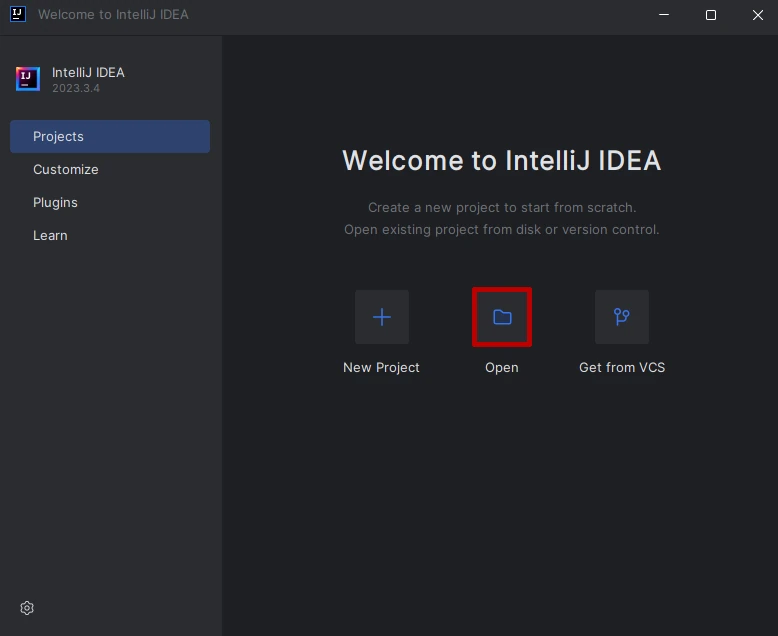
If you currently don’t have an open project inside IntelliJ you should see the following screen when starting the program up. If this is the case, you have to click on open and find your project. Inside your project folder you have to select your build.gradle.kts file and click on the OK button.
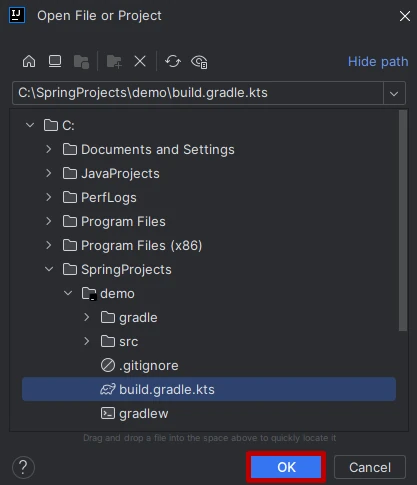
After clicking on OK you will see the dialog from the screenshot below on your screen, because IntelliJ is understanding that the build.gradle.kts file belongs to a project and now asks you if you want to open the whole project or just the file. So you have to click on Open as Project.

Open a Project inside IntelliJ IDEA
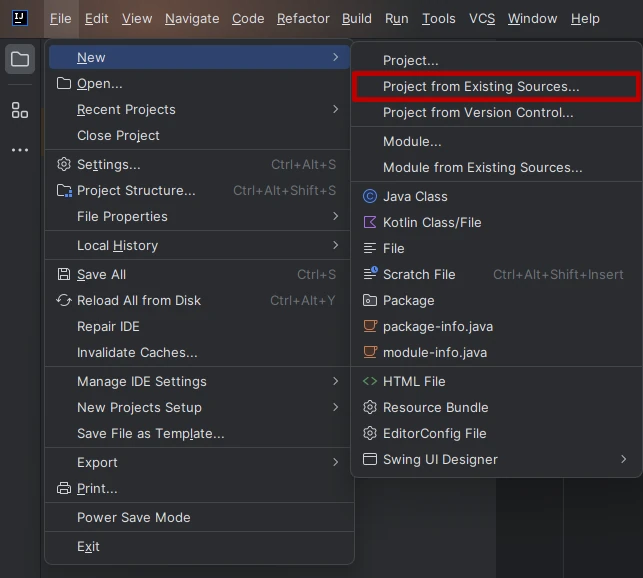
If you have already opened a Project in IntelliJ you firstly have to click on File on the top navigation bar, select new and then click on ‘Project from Existing Sources…’. You then have to find your unzipped project and select the build.gradle.kts file inside the project folder.
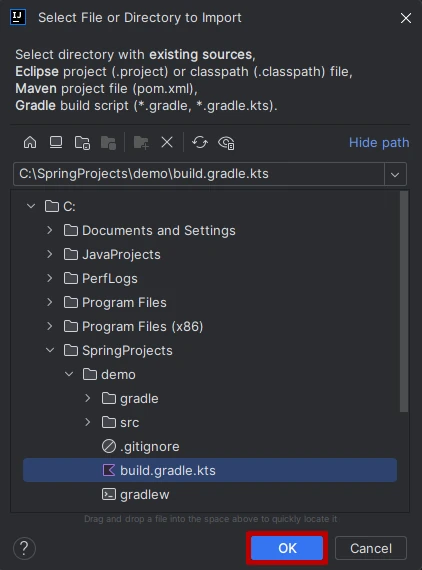
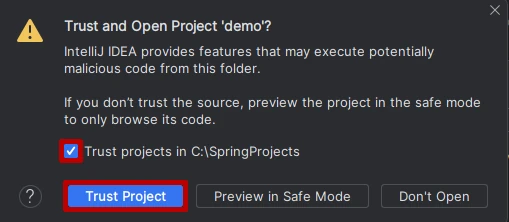
Wheter you have already opened a Project or not you will probably see the warning message from the screenshot below on your computer. Since you created that project by yourself on an official website of Spring you can just select Trust Project. If you don’t want to see such warning messages in the future again you can also set the checkbox above the buttons to trust the whole parent folder of the just opened project.
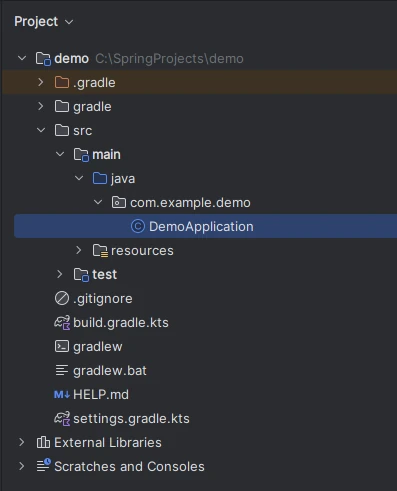
After all those steps your project structure on the left looks like that.
Adding REST Methods to your Java Web Application with Spring
Since your just imported demo project will do nothing, we are going to add two REST Methods to your project and try them out later on.
First of all you have to add a new class inside your project. How to do that is already covered in this article. You can choose whatever name you like. For this example, I am naming it ‘DemoController’. To tell the Java web application with Spring that this class will carry REST methods, you have to add the @RestController annotation like below.
package com.example.demo;

import org.springframework.web.bind.annotation.RestController;

@RestController
public class DemoController {
}
Now we are going to add two different REST methods to your DemoController. The first method is to just greet you. This can be done with the following code.
package com.example.demo;

import org.springframework.web.bind.annotation.GetMapping;
import org.springframework.web.bind.annotation.PathVariable;
import org.springframework.web.bind.annotation.RestController;

@RestController
public class DemoController {

    @GetMapping("/greet/{name}")
    public String greetMe(@PathVariable String name) {
        return "Hello " + name + "!";
    }
}
The @GetMapping annotation tells the program that this is a GET method and can be accessed when you add /greet to your web address. With the {name} inside the @GetMapping the program knows, that it should use everything after the /greet/ as the method parameter which is annotated with @PathVariable. It is important, that the method parameter and the variable name inside the curly brackets are the same.
The second method we are going to add will sum up two numbers. This is archived with adding the sumOfTwoNumbers method like below.
package com.example.demo;

import org.springframework.web.bind.annotation.*;

@RestController
public class DemoController {

    @GetMapping("/greet/{name}")
    public String greetMe(@PathVariable String name) {
        return "Hello " + name + "!";
    }

    @GetMapping("/sum")
    public String sumOfTwoNumbers(@RequestParam("num1") int number1, @RequestParam("num2") int number2) {
        return "Sum: " + (number1 + number2);
    }
}
As above the @GetMapping is telling us where to find the method. But now we don’t want to use PathVariables like in the greetMe method but rather use @RequestParam instead so the parameters are now not getting filled with the value behind /sum/. Instead of that we are now interested in parameters like the following: /sum?num1=5&num2=10 .
Try out your Java Web Application
To try out your just-added REST methods, you have to go back to the DemoApplication class and click on the play button next to your code. You should then see the bootup process in your build output window at the bottom. After you see Completed initialization in the build window you can test your methods.
To test the greet method you simply have to open your browser and type http://localhost:8080/ to get to your web application and then add /greet/<YourName> to it so your address bar should look like this: http://localhost:8080/greet/<YourName>. If you then hit enter you see ‘Hello <YourName>!’.
If that was working fine, you can now try the second method. For that you have to remove the /greet/<YourName> part of the url so you just have http://localhost:8080/ again and then add /sum with two request parameters named num1 and num2. So the final request should look like this: http://localhost:8080/sum?num1=<Number1>&num2=<Number2>. After clicking enter again you can now see the sum of the two numbers you entered.
Assuming everything is working fine, you have successfully created a Java web application with Spring. If you have any troubles feel free to leave a comment.


