Hello tech enthusiasts! Welcome back to jasta, your go-to destination for all things tech. Today, we’re diving into how to create your first Java program with ease, providing a step-by-step guide to help you accomplish this on your computer. Whether you’re a seasoned tech guru or just starting your digital journey, our straightforward instructions will make the process a breeze. Let’s jump in and create your first Java program.
Table of Contents
Create your first Java program
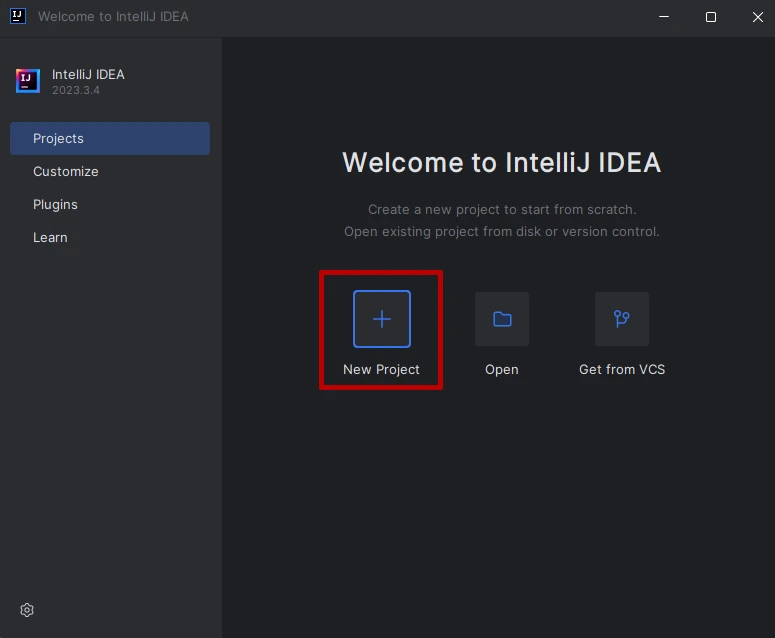
To create your first Java program you have to start IntelliJ IDEA. If you don’t already have installed IntelliJ you can follow this guide to do so. After the program is started, your screen should look like the screenshot below. There you can click on new Project to create your first Java program.
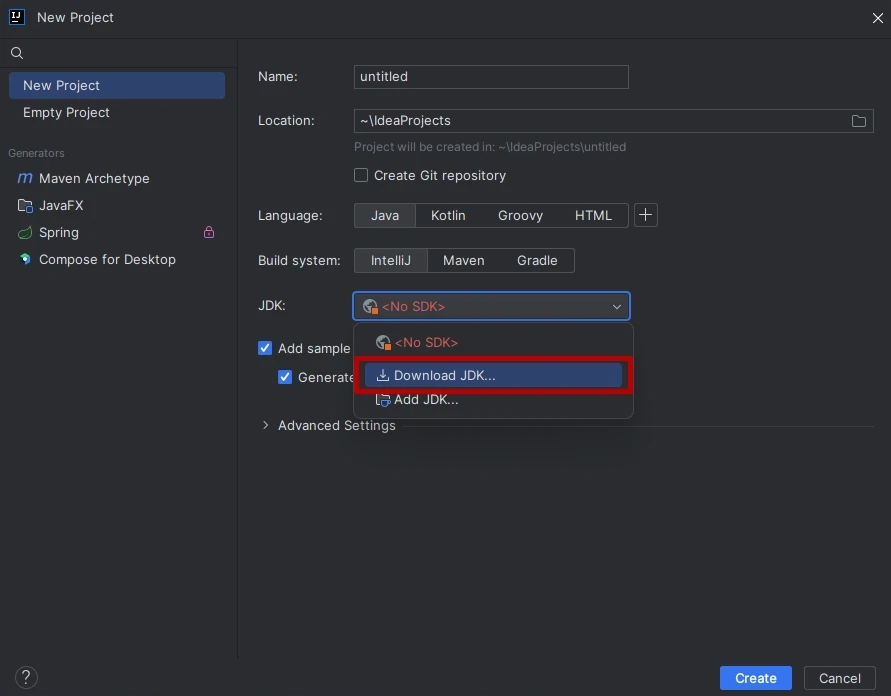
Now you will see the project configuration screen. In the middle of this window, you will see the section JDK with a drop-down list. If you have never programmed Java before, the text “<No SDK>” will be selected in the menu. To add a SDK you can simply open the drop-down and click Download JDK. In the following windows, you should select the newest available LTS version. LTS stands for Long-Term-Support. To find the newest LTS Java version, you can visit the official Oracle Java SE Support Roadmap website. In this case, the newest version is 21.
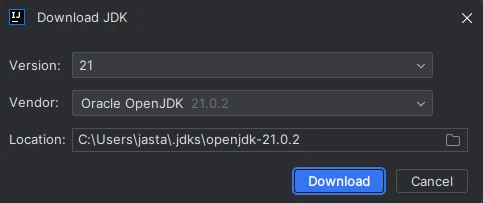
After downloading the JDK it should be automatically selected on your project configuration screen – if not just select it from the drop-down menu. Now you have to fill out the remaining project configurations.
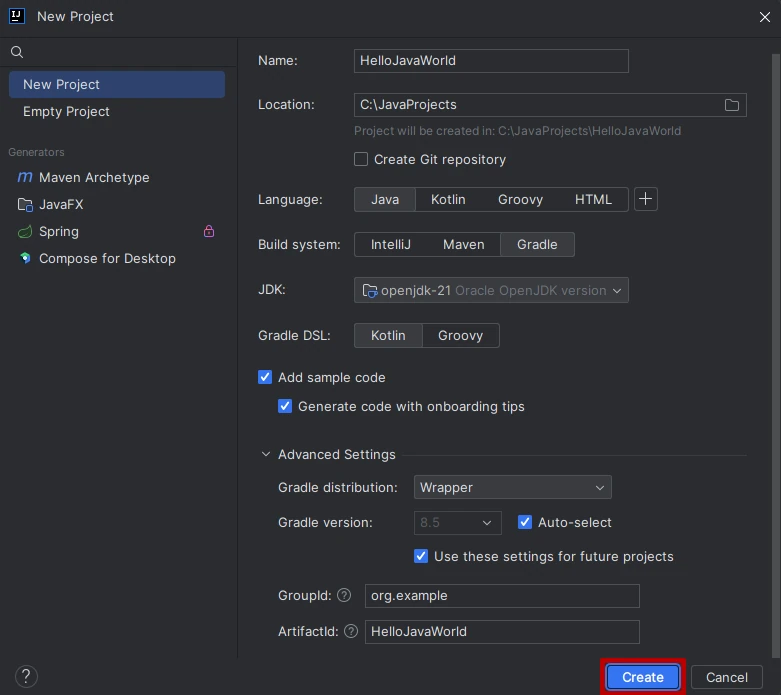
For the project name and the location, you can choose whatever you want. The preselected language Java is already correct so we leave that as it is. When choosing the build system you can choose whatever you like the best, but it is recommended to use Gradle for various factors. This includes customizability and performance. Sometimes after changing the build system, the just downloaded JDK will be deselected. If that happens, you can just reselect it.
Below the JDK menu, you can select the Gradle DSL which simply means in what language the Gradle files are written. While it does not matter that much, it is recommended to choose Kotlin, because it is superior to Groovy.
If you want you can check the two checkboxes below to add sample code and to generate the code with onboarding tips. But you can also uncheck them and just copy the necessary code which is provided later in this post.
You can also open the advanced settings by clicking on it. Sometimes there might be a version conflict between your JDK and your Gradle version. For example, you need to use at least Gradle version 8.5 for the JDK version 21. If there is a lower version selected, you have to deselect Auto-select and enter the required version. For every other field, you can leave with the prefilled values.
Now your project configuration window should look similar to the screenshot provided below. If this is the case, you can now create your first Java program via the Create button.
Now IntelliJ does create your first Java program with the provided configuration and your screen will look like this.
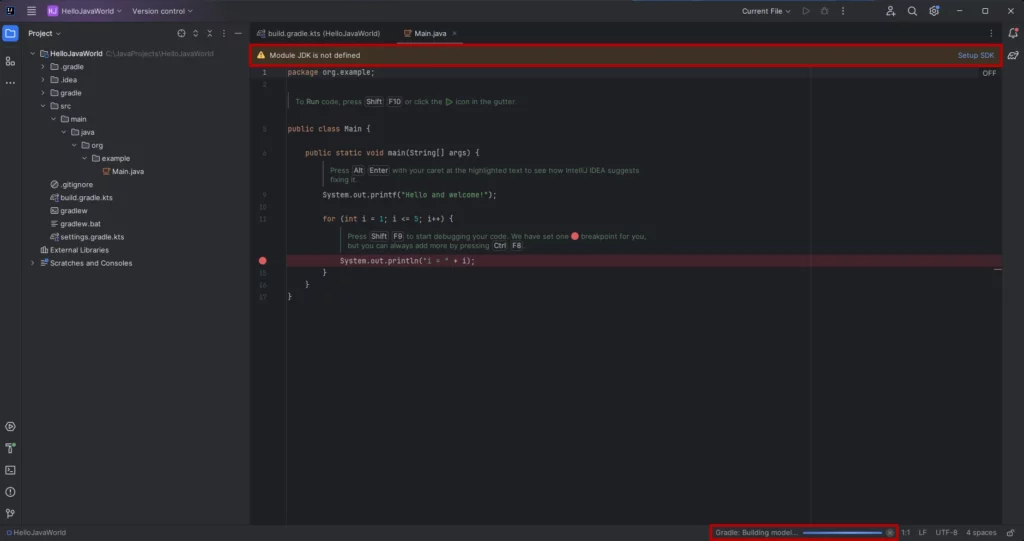
In the screenshot, you can see two highlighted sections. The one on the bottom indicates if there is a process running. While creating your project it will be visible. After it is finished building, the progress bar will disappear.
The marked section on the top will also appear when creating your project. You can either wait till the processes which are shown at the bottom bar are finished or you can press Setup SDK.
Start your program
After your project is finished building, you can now run it. If you did not select the checkbox to create some example code when creating the project, you first have to create a new class. You can do this by right-clicking on your Java folder which is inside src-main and saying New and clicking on Java Class.
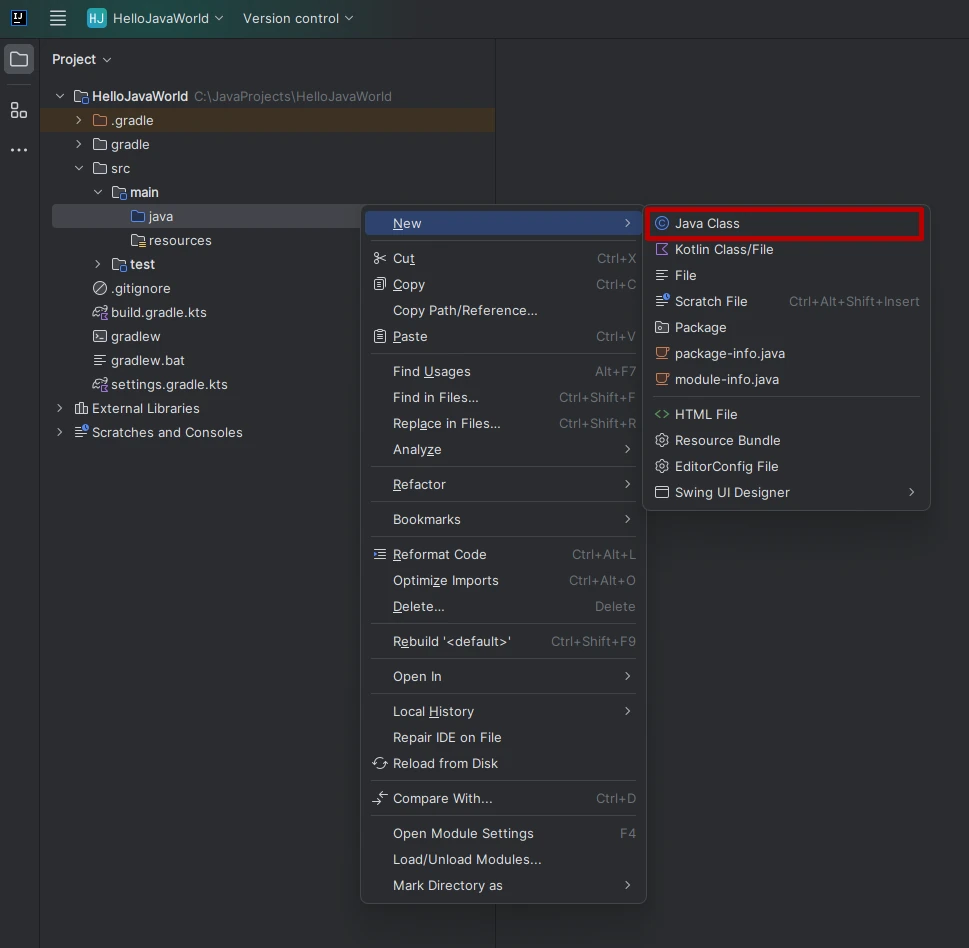
Now you can enter whatever name you like. For this tutorial, you should name it ‘Main’. With that window, you can also create other things like Interfaces and Records but for this program, we need a Class. You can confirm your choices by pressing the enter key.
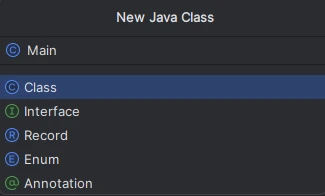
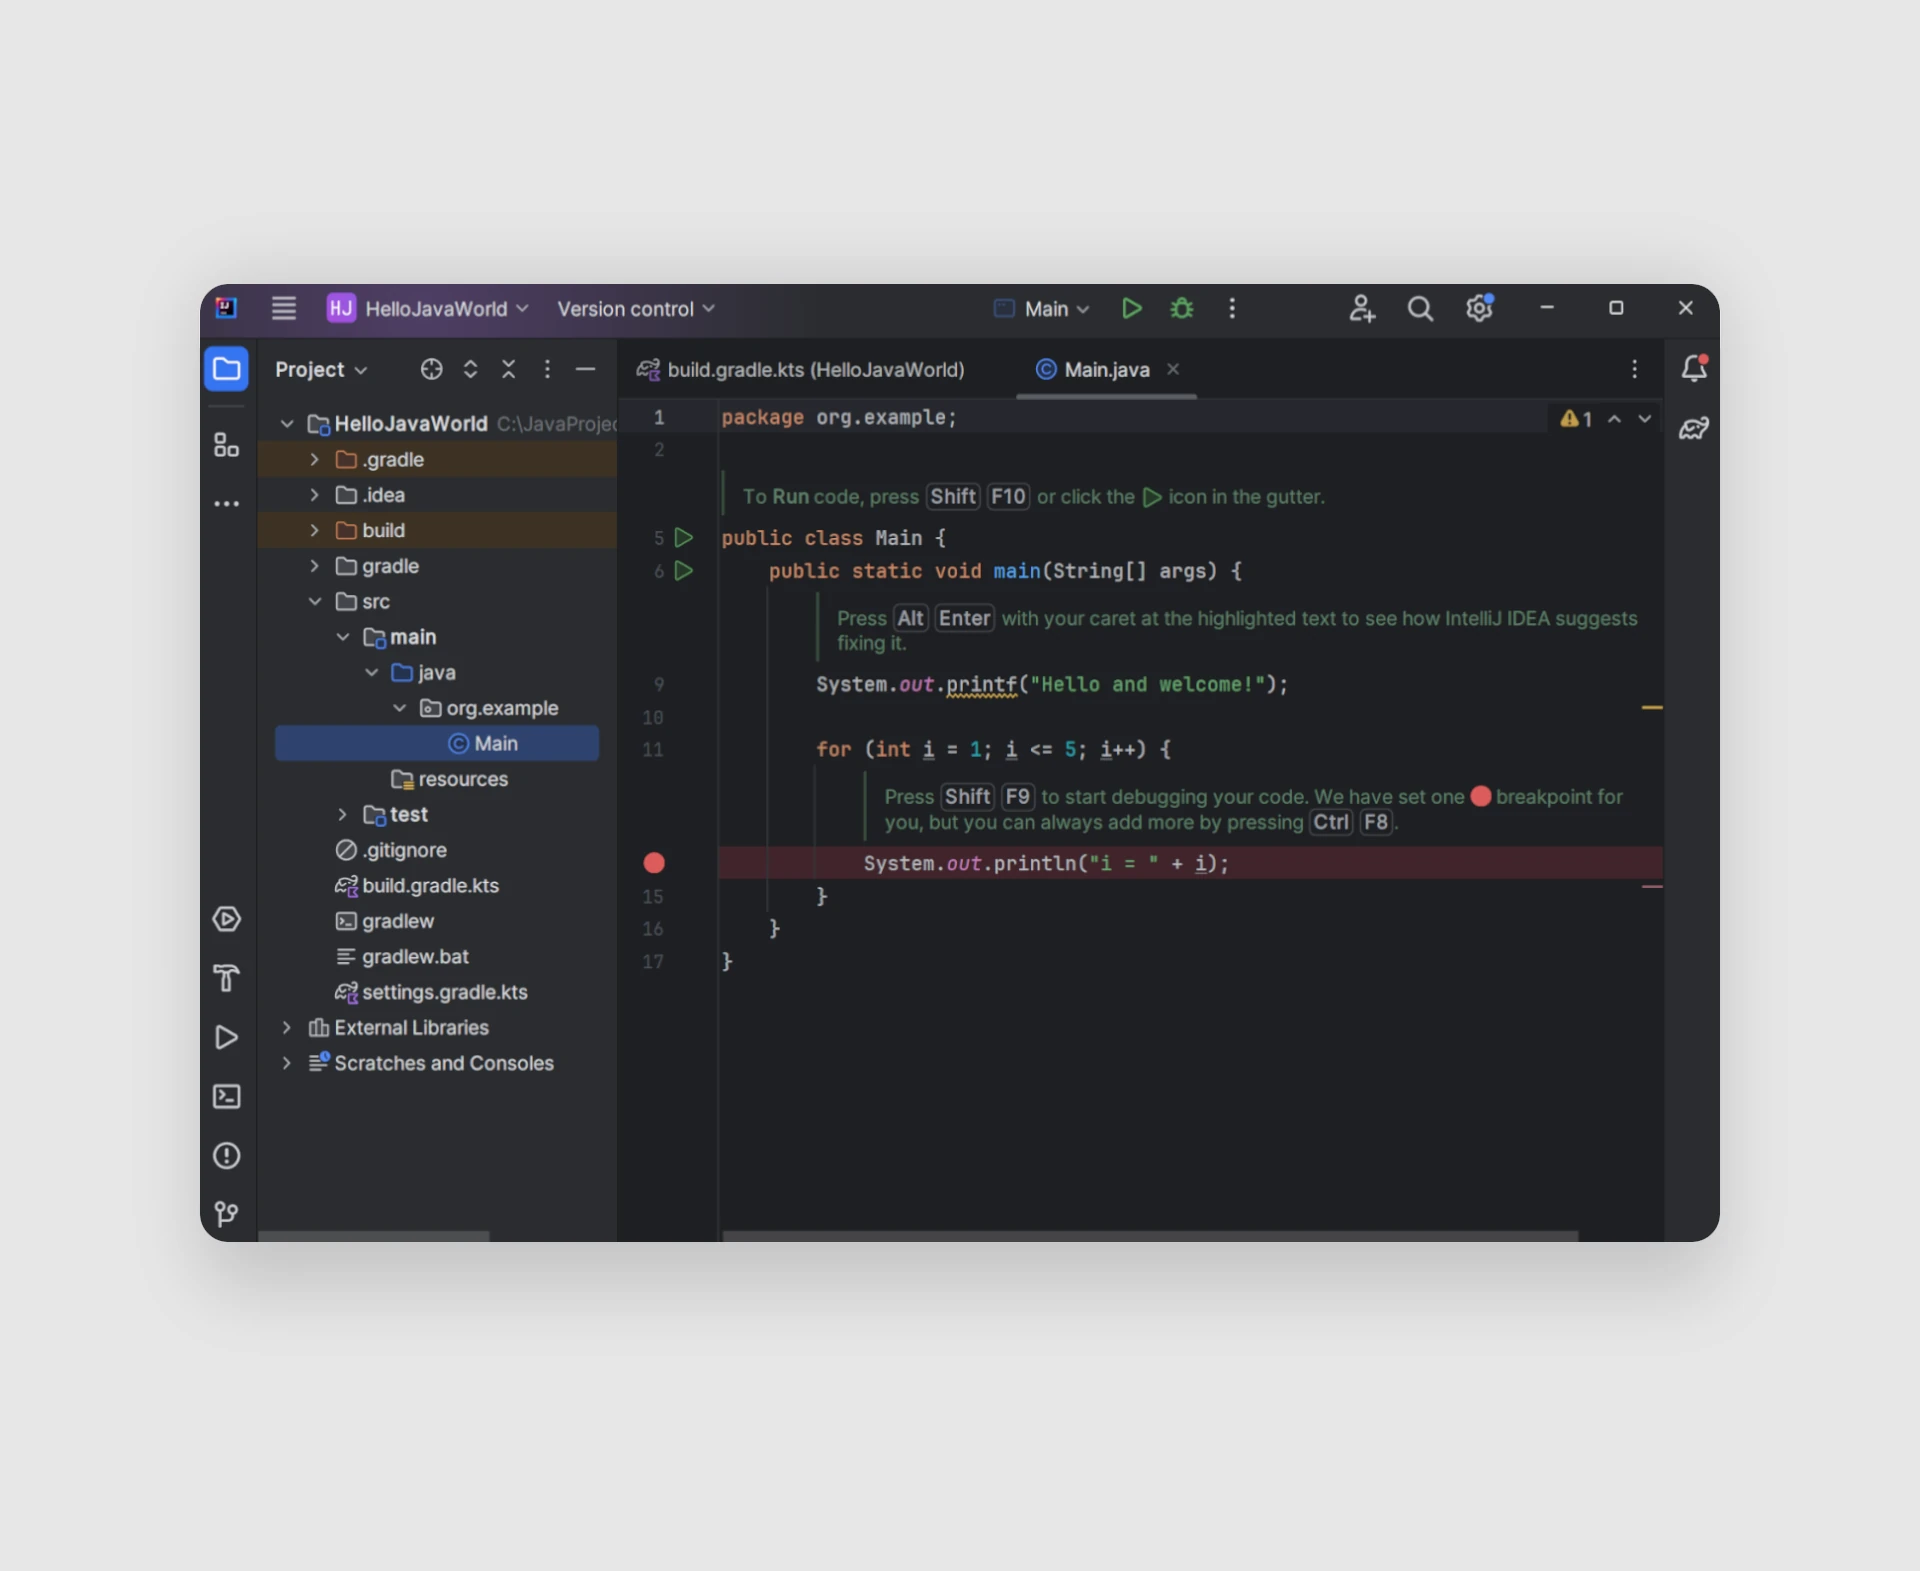
After your class is created you can now insert the example code from below.
public class Main {
    public static void main(String[] args) {
        System.out.printf("Hello and welcome!");

        for (int i = 1; i <= 5; i++) {
            System.out.println("i = " + i);
        }
    }
}
To run your first Java program you have to either click on the play button at the top right or click on the play button next to your code and select Run Main.
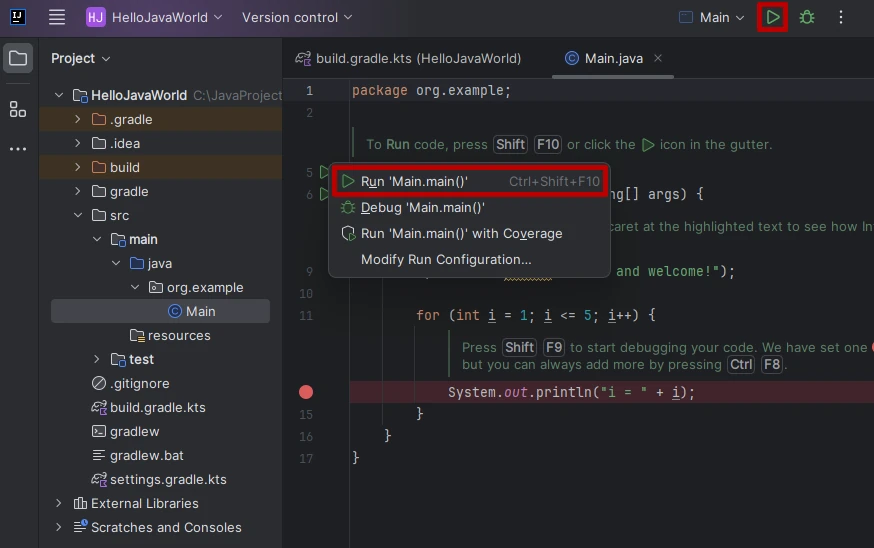
Now IntelliJ will compile your project. While compiling, an output window will open at the bottom of your IDE. There you can see some messages regarding the building of the project and you will also see the result of your first Java program. Since this is a rather small project the output will be displayed very quickly.
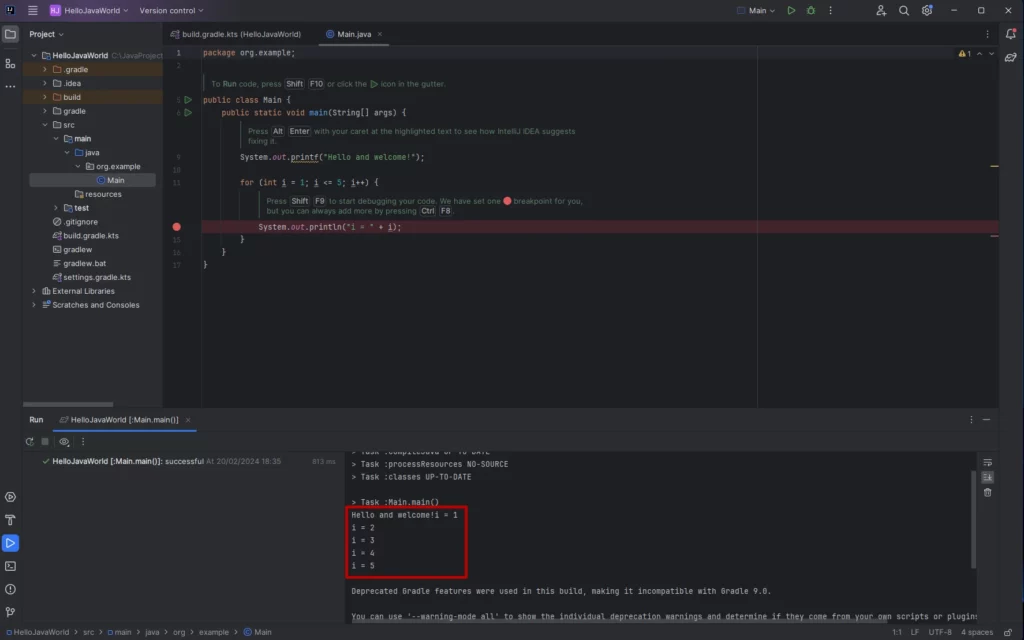
The result displays firstly the sentence ‘Hello and welcome!’ which is done with the command System.out.printf(). After that, you can see the numbers from 1 to 5. This is done via the for loop which is simply counting from 1 (i = 1) to 5 (i <= 5) while i++ says i should be incremented by 1 with every run. Inside the for loop, you can see a slightly different version of the first command to output the ‘Hello and welcome!’. The only real difference is that System.out.println prints every output inside a new line. To see what is happening inside the for loop it is printing out the current number which is assigned to i in the output window.
Modify the source code of your first Java program
Now that you have created and started your first Java program, you can modify it a bit. Just replace your current code with the code from below. If your current code has ‘package XXX’ in the first line, you have to leave it there and just replace everything below.
import java.util.Scanner;

public class Main {
    public static void main(String[] args) {
        System.out.println("What is your name?");

        Scanner reader = new Scanner(System.in);
        System.out.println("Hello " + reader.next() + "!");
    }
}
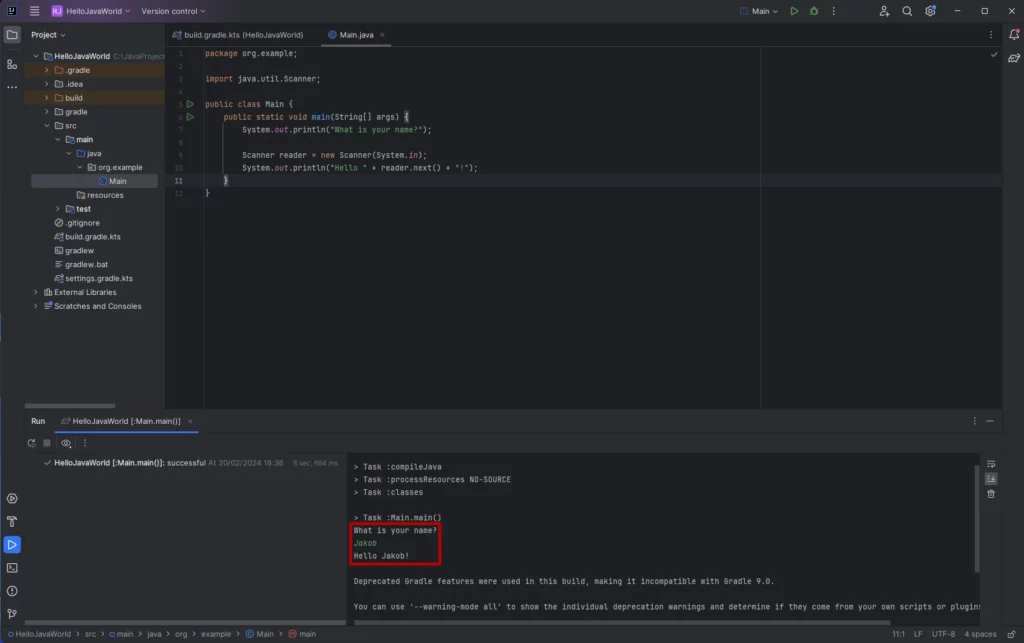
If you execute the program now, you will see that it is asking you for your name. Just enter your name at that point and press enter. The program will now greet you.
From this code, you will already recognize the ‘System.out.println()’ which is printing something out in your output window. The only new part is the Scanner, which is there to read your input, in this case, your name.
The last ‘System.out.println()’ now combines your input which we get via reader.next() with ‘Hello’ and a ‘!’.
Maybe you have also noticed the import statement on top of the code. This is necessary so that we can use the Scanner class inside our Main class. But you do not have to worry about this too much because IntelliJ creates the imports for you automatically while programming.
Now you have successfully created your first Java program and also modified it.
Have fun coding!


