Hello tech enthusiasts! Welcome back to jasta, your go-to destination for all things tech. Today, we’re diving into creating a virtual Windows 11 machine on VMware, providing a step-by-step guide to help you accomplish this on your computer. Whether you’re a seasoned tech guru or just starting your digital journey, our straightforward instructions will make the process a breeze. Let’s jump in and get your Windows 11 VMware set up.
Table of Contents
Requirements for creating a virtual Windows 11 machine on VMware
- Windows 11 ISO file
- VMware Workstation Player or Workstation Pro
Windows 11 ISO file
To create a virtual Windows 11 machine on VMware, you need to have a Windows 11 ISO file.
To get that you have to visit the official download center of Microsoft.
On that page, you will find the section “Download Windows 11 Disk Image (ISO) for x64 devices”.
Select in the drop-down menu beneath “Windows 11 (multi-edition ISO for x64 devices).
Then press Download Now.
Now the website is presenting you another section with a drop-down menu to choose the language for the Windows 11 ISO file. You can choose whatever language you like, even though English will be the best option for the majority.
After confirming your language you can press 64-Bit Download to start downloading your ISO file.
VMware Workstation Player or Workstation Pro
VMware offers two different products. The Workstation Player and the Workstation Pro. Both options are quite similar, so it doesn’t matter which one you choose. The only problem is, that the Workstation Player can be used forever for free, whereas the Workstation Pro can only be tested for 30 days. After that period, a license is mandatory.
You can download the Workstation Player here and the Workstation Pro here.
Creating the virtual Windows 11 machine on VMware
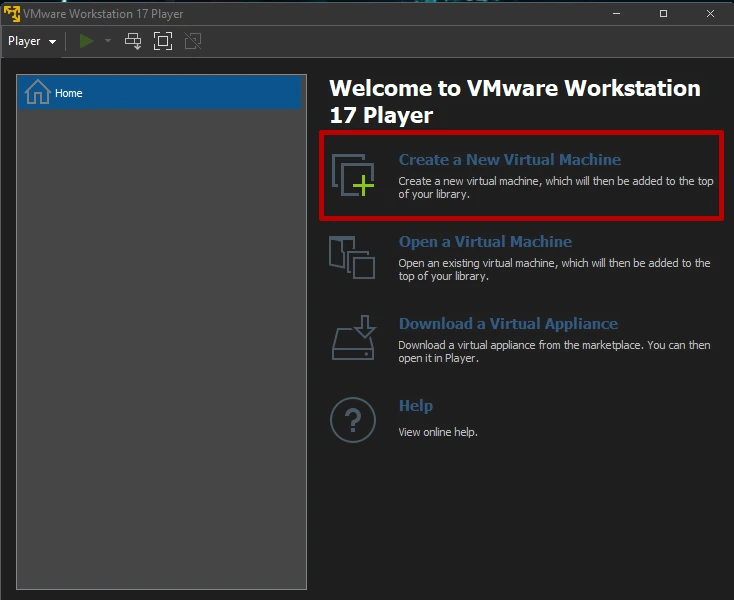
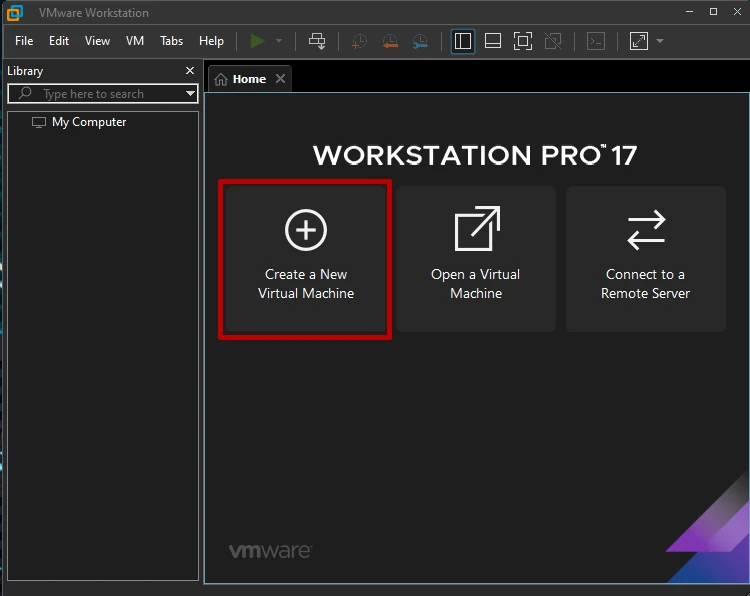
When opening up the VMware software regardless if you have downloaded the Workstation Player or the Pro you can instantly see the “Create a New Virtual Machine” Button, which you have to click to create your virtual Windows 11 machine on VMware.
After clicking on that Button, a Popup will be shown. If you are using VMware Workstation Pro you will first have to choose, which configuration you want to do. You can just leave the preselected option (Typical) and click next. After that, you will see the first window of the New Virtual Machine Wizard. If you are using the Workstation Player, you will instantly see this window.
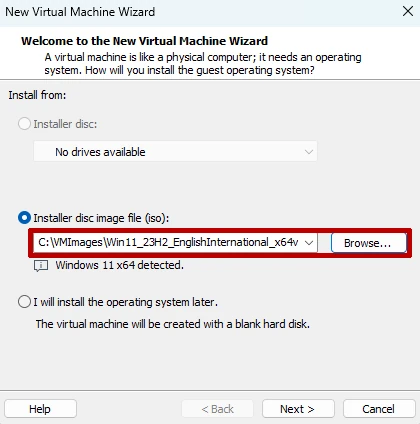
After clicking on next, you can choose the name of your virtual machine and the location. Keep in mind that the virtual machine will take up a lot of space, so choose a location wisely. After confirming the name and the location, you have to add encryption Information. Enter a password that you would like to use to encrypt your virtual machine and confirm it in the box below.
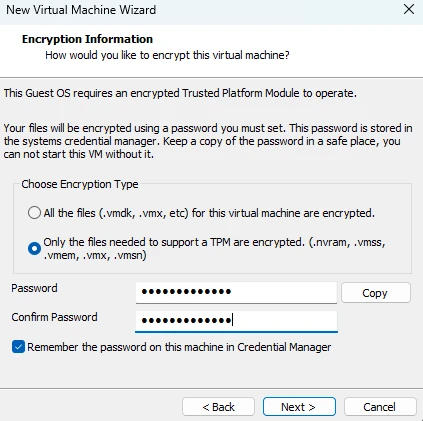
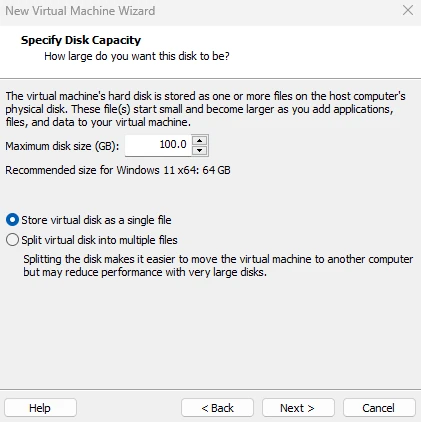
Confirm your password and selections by pressing next. On the next page, you can choose how much space should be used for your virtual machine. For Windows 11 it is recommended to have at least 64 GB of space. Also, you can choose between storing your virtual machine’s hard disk as a single file or multiple files. We recommend using the first option, “Store virtual disk as a single file”.
After confirming your input by pressing Next, you’ll see the last step of creating a virtual Windows 11 machine on VMware. There you have a quick overview of your settings and the specified hardware. By clicking on Customize Hardware, you can change some hardware settings. If your computer does have 16 or more GB of RAM and you are not planning to do heavy work when your virtual machine is running in the background, you can increase the RAM of the virtual machine to 8 GB for better performance. Otherwise, you can leave the default setting of 4 GB.
Good to know: You can change your hardware settings later as well, so if you decide to upgrade the RAM there is no problem in doing that.

The virtual Windows 11 machine on VMware is completed with a click on Finish. If you have checked the checkbox below Customize Hardware, the virtual machine will power on automatically. If not you can select your machine in the list you see on the starting screen and press the green play button to start it.
Now the default Windows installation should show up. Set up your Windows OS as you like and your virtual Windows 11 machine on VMware is good to go!
To improve the overall performance of your virtual machine, get some useful features and automatically scale your VM to fit your screen perfectly, you can read How to Speed Up your Virtual Machine and unlock helpful Perks.


